|
This is Buzzfeed Tasty's Korean Style Ribs recipe. I try to only bring you guys recipes that I have either created myself or adapted from something else, but I needed to share this one with you. I followed the recipe exactly, and let me tell you, these. are. delicious. They take several hours to make, but only about 10-15 minutes hands-on time. Because I didn't modify this in any way, I'll give you my notes/suggestions throughout the recipe. Scroll down to read on! 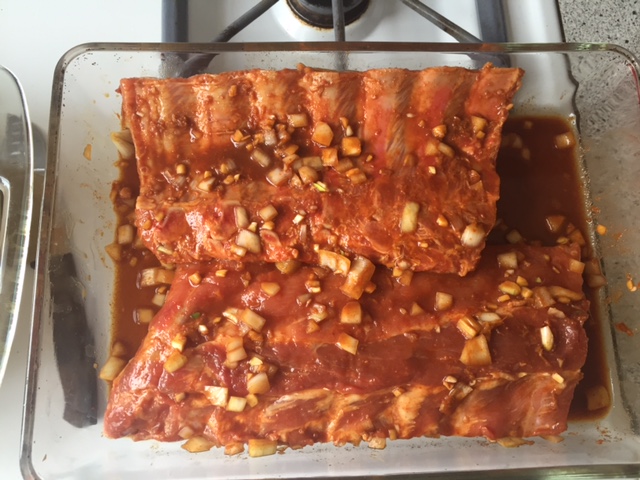 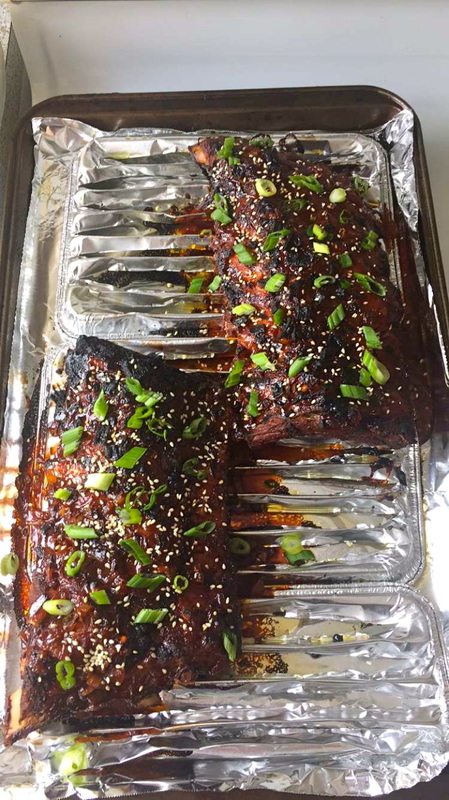 Ingredients:
• 1/2 cup soy sauce • 2 tbsp rice vinegar • 2 tbsp sesame oil • 2 tbsp red pepper powder • 8 garlic cloves (minced) • 1 tbsp grated ginger • 1 cup onions • 1/4 cup honey • 3 lbs baby back ribs (I used 2.85 lbs, and the meat to sauce ratio was perfect, tbh) Optional toppings: Sesame seeds Chopped scallions or green onions (I used green onions) Directions: • In a large bowl, combine soy sauce, rice vinegar, sesame oil, red pepper powder, garlic, ginger, and onions Note: red pepper powder is EXTREMELY spicy...that's coming from a Puerto Rican with a high tolerance for spice...There's enough meat in the ribs to offset the concentrated level of heat you're adding to the marinade, but if you are sensitive to spice, I would use either half the amount of red pepper powder OR substitute with cayenne • Add ribs to a large dish and pour the marinade over top, rubbing the sauce in with your fingers. Make sure to get both sides. Allow to marinate for at least four hours. Note: I prepped my ribs on Saturday evening, and let them marinate over night..total of about 16 hours. I think this makes a big difference as rib meat can be pretty tough. The longer you let them marinate, the more liquid the meat will absorb. • Preheat oven to 400° and place ribs on baking rack over a baking sheet. Save your marinade! Note: The baking rack was omitted in Tasty's version, but I'd strongly suggest using one. By creating a space between the ribs and the baking sheet, you allow the heat to circulate underneath, which helps cook all sides more evenly. If you don't have a baking sheet, like me, you can either... get one... or you can use a few of these foil broiler pans from Hefty (lmao). I just cut slits in between each of the ridges, and it worked like a peach. They're like 2 bucks for a set of 3. • Cook ribs for 2.5 to 3 hours and remove. Turn on broiler. Note: I put the ribs in before church, and got stuck in traffic on my way back, so they got the full 3 hours. I'd suggest keeping it at 2.5 • Once removed, add marinade and honey to a small sauce pan. Bring to a boil over medium/high heat, and continuously stir until you've formed a glaze. Spoon over your ribs and place under broiler for about 3 minutes, or until the glaze has caramelized Note: stay nearby. The original recipe suggested broiling for 5-10 minutes, but the glaze started burning right at the 3 minute mark • Top with sesame seeds and scallions or green onions, and serve while hot!
1 Comment
LOL I am WELL AWARE of how #CookingForBae these pics are, but I wasn’t on my photog game this night. Anyway, I promise these burgers don’t disappoint and are super easy to make. They are bursting with flavor and ooooozing with melty cheese. I always hate myself for being vegetarian when I make these. But I DO make a KILLER veggie burger that I’ll be sharing later on. 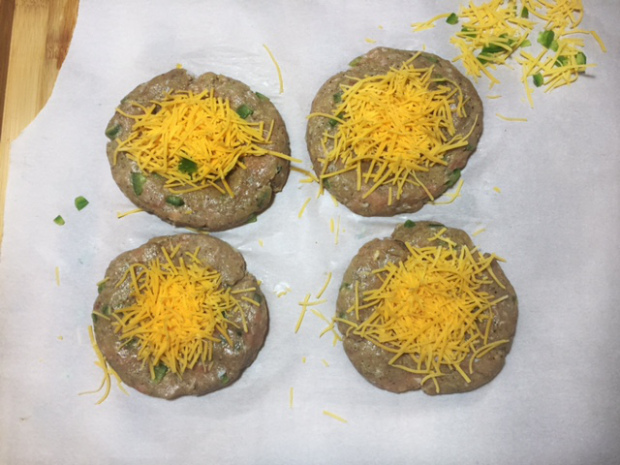 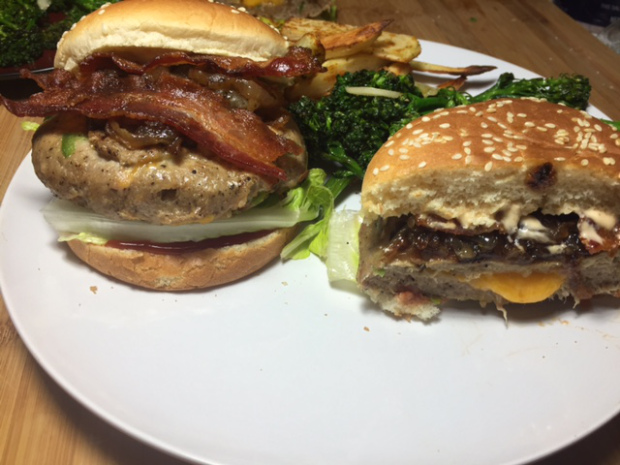 Ingredients:
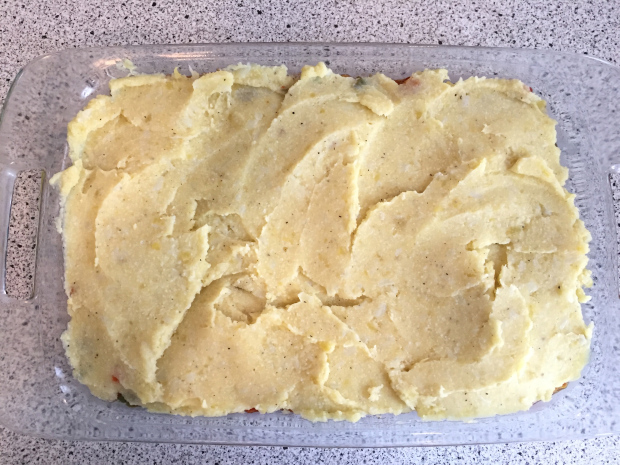
• 1 lb of lean ground turkey • 1 egg yolk • 1/2 cup of shredded cheese (I use a mix of cheddar and colby jack) • 2-3 tbsp jalapeño (seeded and diced) • 2 cloves garlic (diced) • 1 tbsp onion powder • 1/2 tbsp chili powder • 2-3 tbsp breadcrumbs (this acts as a binder, so you’ll need more or less depending on how moist your turkey is) • 1 tsp salt • 1/2 tsp ground black pepper Optional toppings: 1 small onion (sliced and caramelized) Bacon (CRISPY) BBQ sauce or choice or spicy mayo Crispy lettuce More cheese Directions: • Add all ingredients, EXCEPT for the cheese, to a large bowl. By hand, mix until well combined, then divide into 4 equal parts • Take a large pinch (about 2 tbsp..I’d say X amount of ounces, but I don’t know shit about ounces) from each of the 4 sections and set aside • By hand, flatten your larger sections into patties, and press down into the center of each patty to create a shallow “bowl” (leave about half an inch of space along the edge of the patty, and about a quarter inch in the bottom thickness of the patty). Say “patty” again, Trill. • Press cheese into the shallow bowls Note: if you want the centers to come out exxxxtra creamy, mix the cheese with a bit of spicy mayo • Take the smaller portions you removed from each section, and by hand, flatten to about a quarter inch thick and lay over the cheese. With a fork, press the edges of the top patty into the edges of the bottom patty (sorry I forgot to take a picture of this part) • Heat a skillet or grill pan over high heat and, working with 2 at a time, cook each side of the patty for about 3-5 minutes, until golden brown and cooked through • Build your burger with your toppings of choice and serve immediately Note: I served these with homemade crispy baked fries. Let me know if you want the recipe! Note: these are freezer friendly, and great to have on hand when you just don’t feel like cooking. individually wrap cooked patties in saran wrap, place in freezer bag, and freeze. let completely thaw (sitting about 1-2 hours on counter, OR for expediency, place bag in shallow dish filled with warm water) before reheating on skillet. Sterling moved to Chicago from Dallas in November of 2013. It snowed the day he got here, and continued to snow through the end of May. Yes, May. That January, we got down to -40º with the wind chill. Now, some of you tough guys may be thinking “that’s not thaaat bad” (which you are wrong), but we also lived next to the lake at the time…if you don’t know what lake effect cold is like, I am glad for you. That shit slices through your bones. So anyway, the day it hit negative 40, a pipe burst in our building, shutting off our hot water. Fortunately, my parents only lived about 30 minutes from us, so we drove to their house to shower, and returned home around 8 pm. Soon after settling on the couch, we noticed our vents were blowing out cold air. We called the building to find out that a second pipe had burst, subsequently eliminating our hot water AND heat. I remember we were standing in our bathroom with the door closed, in winter coats, blowing hot air on ourselves with my hair dryer. We got into bed (in full sweatsuits, with SOCKS, God help me), rolled ourselves into a 3 blanket burrito, said our potentially final “I love you’s” and prayed to see another day. Needless to say, we ended up making it through the night and lived to tell the tale. OH, I forgot to tell you the best part of the story….While this was all happening, we were on day 2 of a f*ckin JUICE CLEANSE!!!! So we’re over here cold, malnourished, and shaking, drinking kale and rationing off portions of raw, unsalted almonds- which I had to allow as a safety precaution. Lowkey I wanted to quit, but Sterling, the competitive D1 athlete that he is, decided we needed to finish the cleanse as a demonstration of “mental toughness.” Bless him. So anyway, we’ve had a VERY mild winter this year, especially compared to what we experienced a couple years ago, but it is still chilly and I do find myself craving a warm meal at night (followed always by froyo.. I cannot be tamed), and this one hit the spot. One of my favorite things to do is to find ways to take traditional meat-based recipes and create a vegetarian version that we can both eat. While no dish will ever taste like real meat, you can still create some really filling and satisfying meals that do taste amazing, and this vegan Shepherd’s Pie is one of them! 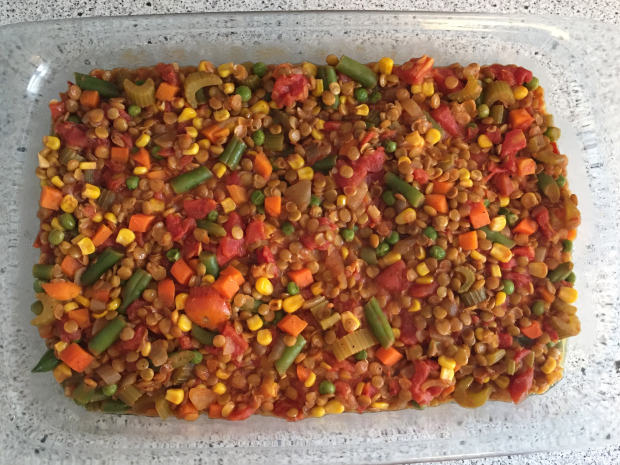 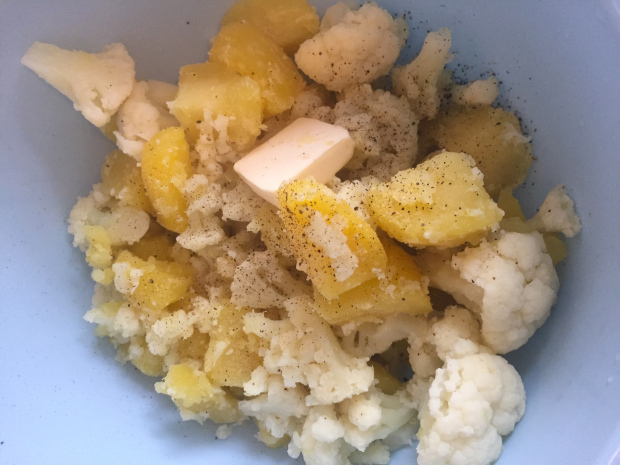 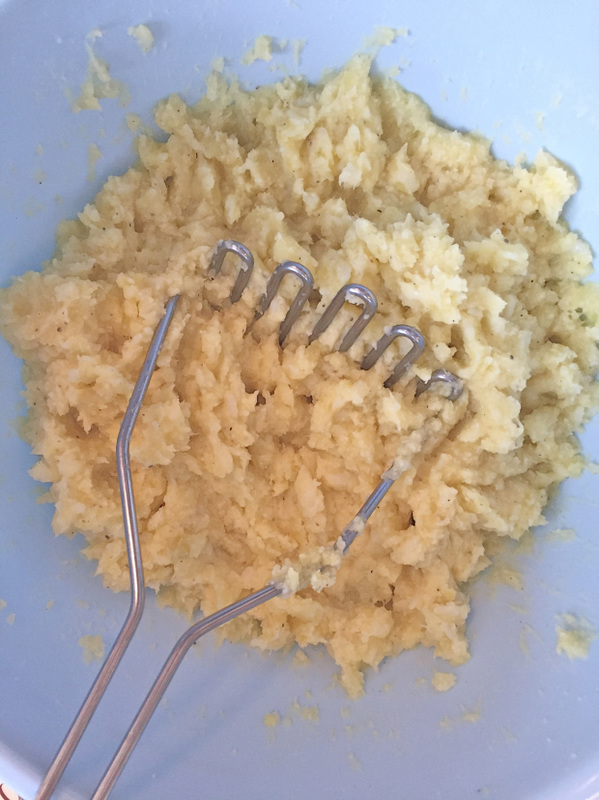 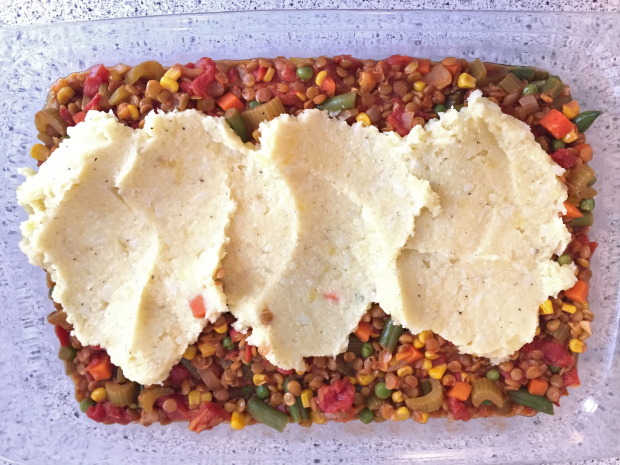
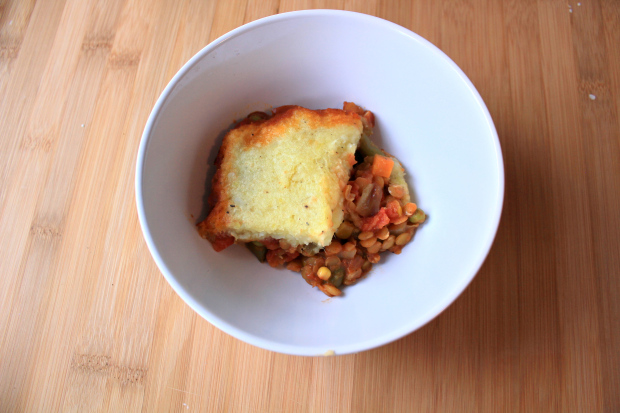 Ingredients:
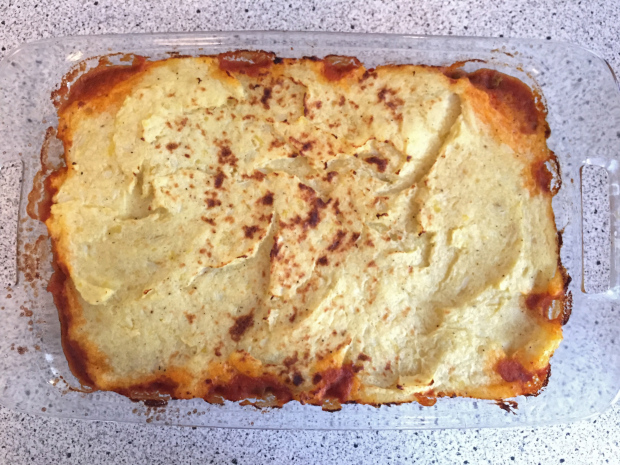
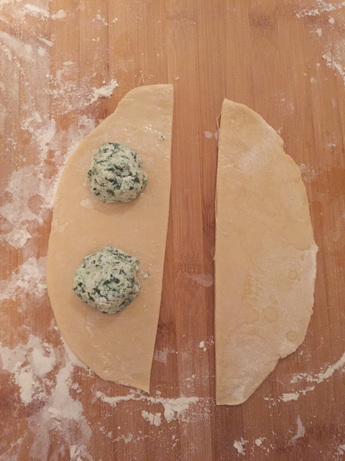
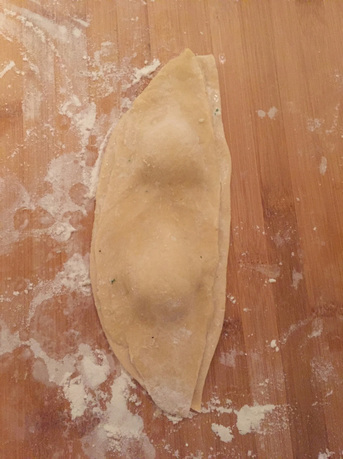
Filling: • 1 tbsp olive oil • 1 medium onion (diced) • 2-3 cloves garlic (minced) • 1.5 cups uncooked brown or green lentils (rinsed and drained) • 1 cup celery (chopped) • 1 (14 oz) can diced tomatoes • 1 (10 oz) bag of frozen mixed veggies: peas, carrots, green beans, corn Note: Green beans and corn are not used in traditional Shepherd’s Pie. I actually only used these because my grocery store was out of solo frozen peas, so I just grabbed this bag. It does amp up the veggie content, which never bothers me, but feel free to omit of you want to stay more traditional. In that case, you’d use 2-3 chopped carrots and about a cup of peas. • 3 cups vegetable broth • 2 tsp dried thyme • 2-3 tsp paprika • 2-3 tsp ground cumin • 1 tsp garlic powder • 1/2 tsp ground black pepper • Salt to taste Mashed Cauliflower and Potato Topping • 4 small yukon potatoes (peeled and quartered) • Half of a large head of cauliflower (cut into florets) • 2 tbsp vegan butter (I use Earth Balance) Note: you can obviously use regular butter if you want. I just wanted to keep the whole thing vegan. Note: no, I am not vegan actually • 1 tsp garlic powder • 1/2 tsp ground black pepper • Salt to taste Directions: • Heat oil in a large, non-stick skillet • Add onions and celery, and sauté until tender • Add canned tomatoes, lentils, veggie broth, thyme, paprika, cumin, garlic powder, and pepper. Bring to a boil then reduce heat and let simmer until lentils are tender (about 20 minutes, give or take). If lentils are still firm, add more water or veggie broth in 1/4 cup increments until tender Note: DO NOT ADD SALT AT THIS STAGE. When added to raw lentils, salt actually makes them firm up. Add salt AFTER lentils have cooked • While lentils are cooking, preheat oven to 400 degrees. Add potatoes and cauliflower to a pot of salted water. Bring to a boil, then reduce heat and let simmer for 14 minutes. Drain and add to a large mixing bowl. Add butter, garlic powder, salt and pepper, and mash until smooth. • Once lentils have cooked, add your frozen veggies and mix to incorporate. Let simmer for about 3-5 minutes or until veggies are heated through • Add lentil mixture to a greased 9×13″ dish and spread the potato/cauliflower mixture over top. Bake for about 15 minutes, or until topping has slightly browned and mixture is bubbling Enjoy! 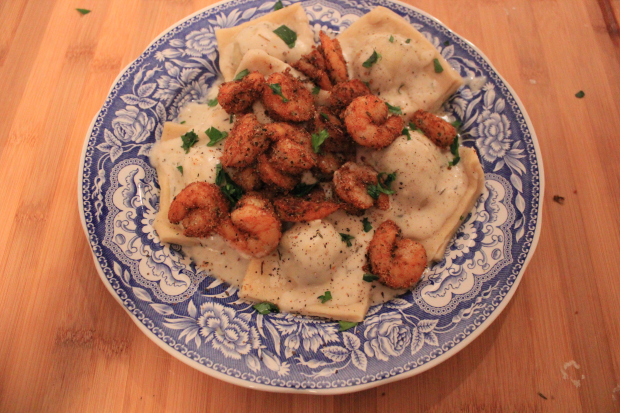 I’d suggest making this when you’ve got extra time on your hands. This is a really fun dish to make because it pushes you a little out of your comfort zone, without being too technically complex. I woke up at 7 am on a Saturday morning, hungover and hungry, contemplating where the day might take me. The first thing I do in the morning, like any douche of a millennial, is check social media, and the first thing I saw on Facebook was this scratch-made-no-ravioli-mold-necessary recipe from Proper Tasty. I immediately decided that I would be making ravioli that night. Would I have made this decision if I wasn’t in a hazy, morning-after-a-3-am-night fog? Yes, probably, because I love pasta and I love cooking. The first step is to make the dough. You’ll let it rise for about an hour, while preparing the filling, shrimp, and blackened seasoning in the meantime. Once the dough has risen, you’re going to roll it out long and THIN across a floured surface. As thin as possible without being transparent. Then add dollops of the filling, evenly spaced about 3/4 inch apart, along the left half of the dough. 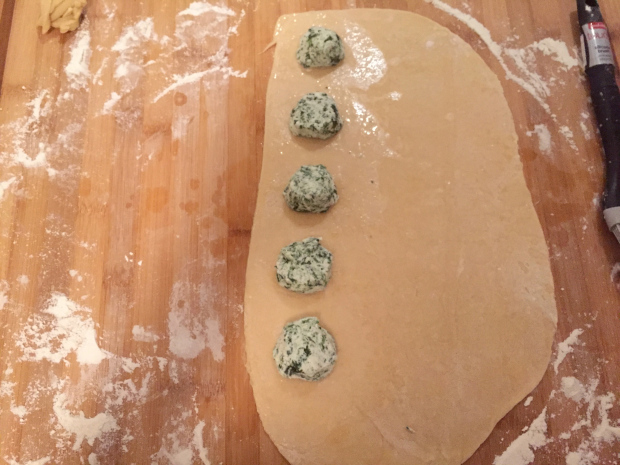 Slice the dough down the middle, leaving about half an inch of space between the filling and the edge of the dough. Brush water (or beaten egg white) around the filling. This will act as a glue to help bind the two layers. Press the naked slice of dough on top of the strip with the filling. With your fingers, press around the filling to eliminate air bubbles, and flatten the edges while fusing the two strips together. Slice evenly between the filling bubbles in that empty, flat portion of dough.
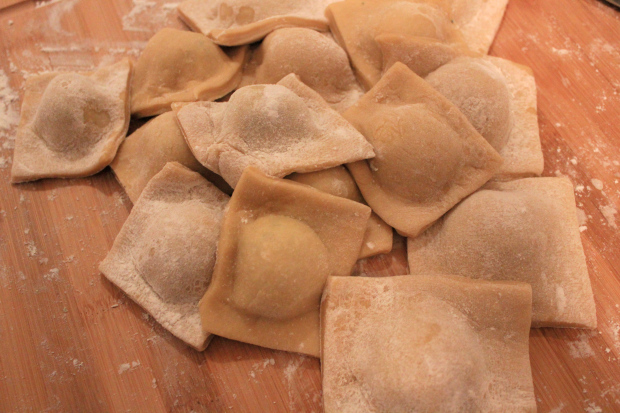 Once done, you’ll be left with this decadent masterpiece. Keep reading for a detailed step by step :) 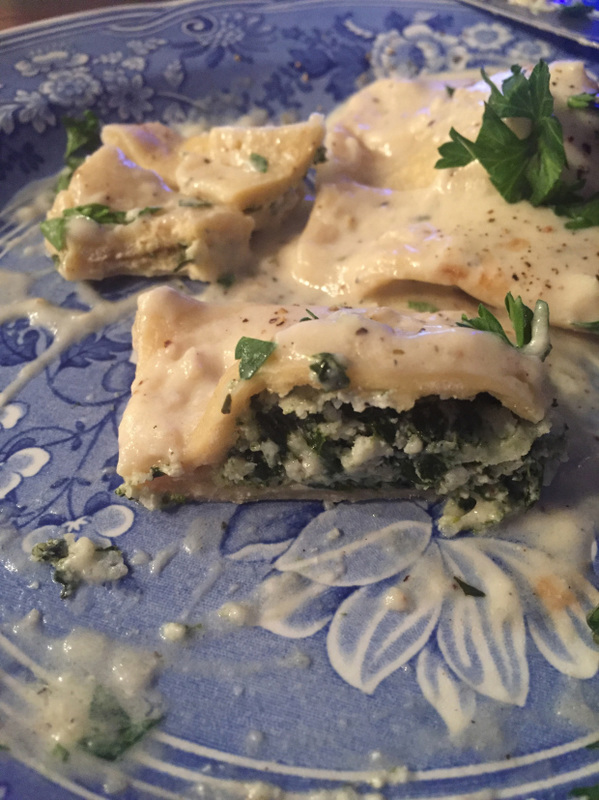 Ingredients:
Pasta dough: • 2.5 cups all purpose flour • 3 eggs • 1/4 cup water Filling (source): • 4 oz goat cheese • 2/3 cup fresh grated parmesan cheese (or you can do 1/3 parm, 1/3 Italian 6 cheese blend) • Bag of spinach (about 9 oz) • Salt and pepper to taste • Dash of nutmeg Sauce (adapted from Damn Delicious) • 2 tbsp unsalted butter • 2 cloves garlic • 2 tbsp all-purpose flour • 1.5 cups milk (I used unflavored, unsweetened almond milk to lighten it up) • 1.5 tsp dried thyme • 1/4 cup half & half • 1/4 cup fresh grated parmesan cheese or Italian 6 cheese blend • 1/4 cup pasta water • Sea salt and ground black pepper to taste • 2 tbsp chopped fresh parsley Shrimp • 1 lb raw or frozen (and thawed) large shrimp (shelled and deveined) Note: I used medium sized shrimp in this recipe, which is what I had on hand, but I think it would be better with the larger guys • 1/2 tbsp and 1 tsp paprika • 1/2 tbsp garlic powder • 1/2 tbsp onion powder • 1/2 tbsp dried thyme • 1/2 tsp ground black pepper • 1/2 tsp cayenne • 1/2 tsp dried basil Directions: Pasta Dough: add flour to large mixing bowl. Create a small well in the middle and add eggs and water. Mix with fork until incorporated, then knead with hands for 5 minutes to get the gluten working. Work those biceps, boo. Cover in saran wrap and let sit in fridge for an hour Filling: Add spinach to non-stick skillet, cover, and cook over low heat, allowing spinach to wilt down. Once wilted, remove cover and let cook until water evaporates. Make sure to stir every few minutes or spinach will stick to the skillet. Once water has mostly evaporated, remove from skillet and lay on paper towel. Take another paper towel and press down on spinach to absorb excess water (if you have a cheesecloth, that would be easier ~and more environmentally friendly!). Now combine all filling ingredients in a small bowl and mix. Create the ravioli: • Preheat oven to 400º • Flour work surface. Remove dough from fridge and cut in two equal halves. Take the first half and roll it out to somewhere around 16″ x 6″. Again, make sure it’s nice and thin. • Add dollops (a tbsp or so) of filling evenly along one side of the dough. Leave about 3/4 inch between each dollop. • Brush water (or beaten egg whites) around each dollop to create a glue to seal the two layers of dough • Cut the sheet of dough in half lengthwise, leaving about half an inch of space between the filling and the edge of the dough • Lay the naked sheet of dough evenly on top of the filling, and with your fingers, press around the filling to release any pockets of air. Press the top layer into the bottom, fusing the two • Cut the ravioli into individual pieces. Set aside. *now bring a large pot of salted water to a boil* Shrimp: Add all blackened seasonings to a small bowl and mix. Season shrimp with salt, then toss in blackened mixture. Space shrimp evenly across lined, greased baking sheet and cook for 8-10 minutes, or until cooked through. Sauce: • Melt butter over medium heat. Add garlic and cook, while stirring, until fragrant. Whisk in flour until lightly browned. • Gradually whisk in milk, thyme, and black pepper. Make sure to add the milk slowly, while whisking quickly, to avoid any clumps. • Once incorporated, stir in half & half and cheese. • Allow to simmer while pasta cooks. If sauce gets too thick, add about a quarter cup of the pasta water Pasta: Add ravioli to boiling water and cook for five minutes (fresh pasta cooks much faster than boxed), or until the raviolis rise to the top. Remove with slotted spoon or oil skimmer. Now just plate the pasta, pour on the sauce, top with the shrimp (if you must) and garnish with freshly chopped parsley and more cracked black pepper! Enjoy and pat yourself on the back! 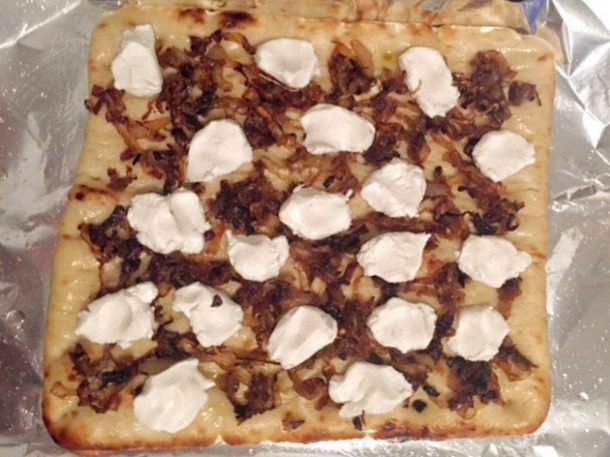 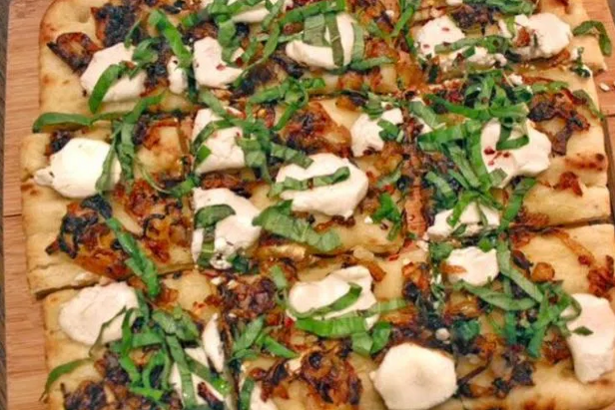 Caramelized Onions. Goat Cheese. Basil. Bread. Jesus be a flatbread. This is crisp, chewy, creamy, rich, and a breeze to make. It’s a real crowd pleaser, I guarantee it. My cousin came over a couple weeks ago and cooked us a FEAST (I’m talking ribs, empanadas, salmon, arroz con gandules, everything). There was so much food, but I still wanted to contribute, so I whipped this up right quick and served it as an appetizer. Our bellies were happy (and extremely full).
Ingredients: • 1 Flatbread. I used this one from Stonefire. I think it was about 8×9″ • 2-3 tbsp olive oil • 2 medium sweet onions (sliced) • 6 oz fresh goat cheese • 8-10 leaves of fresh basil (chiffonade… I don’t know if this is a verb or an adjective) • Splash of balsamic vinegar • Tsp of sea salt • Pinch of sugar • 1/2 tsp cracked black pepper • Cracked red pepper Directions: Note: We are cooking these onions looooow and sloooowwww (about 30 minutes) to build maximum flavor, texture, and sweetness. • Preheat oven to 425 degrees • Heat 1 tbsp oil in skillet over high heat. Once hot, add onions, and allow most of them to develop a nice sear, stirring every so often so as not to burn • Once most of the onions have seared, reduce heat to low. Add salt, black pepper, sugar, and a splash of balsamic vinegar to deglaze the pan. Stir. • Now let the onions do their thing. And you can go do yours (set the table, read a book, twerk to Work, whatever). Just come stir them every 5-10 minutes. • Once the onions have caramelized to candy perfection, take the remaining oil and brush it all over the flatbread. • Sprinkle evenly with the onions, and add small dollops of the goat cheese to any empty spaces so that every bite is delicious. So that it cooks evenly, press the goat cheese down with your thumb to flatten it out a bit. You could also brush a little olive oil over the cheese, to help it stay moist in the oven. • Place the flatbread on a lined baking sheet and bake for about 8-10 minutes, or until the edges have browned and the goat cheese has softened. • Chiffonade (verb? adjective?) your basil. Here’s how to do it. • Remove flatbread from oven and top with basil and cracked red pepper • Serve immediately • Take a bow 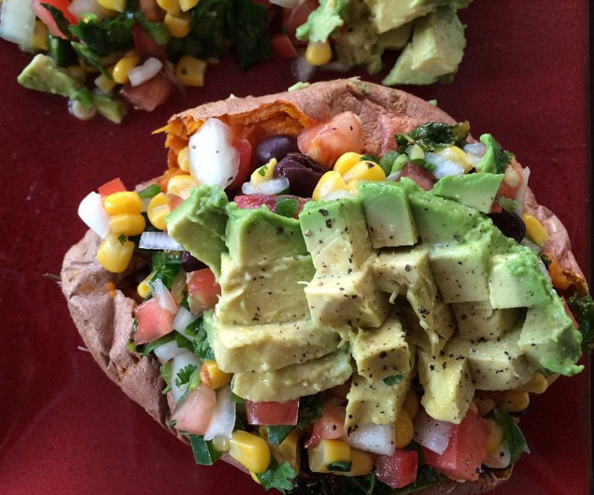 This meal is creamy, zesty, and spicy, and each component adds an amazing textural element, which is so important when foregoing meat and cheese. Like, so important.
This is a sweet potato stuffed with southwestern sautéed kale, tomato corn salsa, black beans, and avocado. This recipe is so filling, so easy to whip up, and also healthy af. I mean, I purchased my veggies from Walmart and baked my potato in the microwave, so mine may have been a little less healthy, but I have student loans and a busy schedule and no time for judgment. Here you're getting a massive dose of omega-3's, vitamins A and C, B6, protein, fiber, and potassium, to name a few. This basically translates into glowing hair, skin, and boosted immunity. Another great thing about this stuffed sweet potato concept is that it’s exceptionally versatile. Topping options are endless. Feta/sundried tomato/sauteed broccoli, or chickpea/raisin/lentil, or caramelized onion/roasted tomato/poached egg…… So anyway, if you wanna get your lil southwestern potato party pants on, here’s what you gotta do: Ingredients (serves 2): • 2 sweet potatoes (scrubbed) • 1/3 to 1/2 cup canned black beans • 1 avocado • 2-3 cups raw curly kale • 1 tbsp olive oil or coconut oil • 1/4 tsp chili powder • 1/4 tsp ground cumin • dash of garlic powder • dash of paprika • salt and pepper to taste Corn/Tomato Salsa • Half large red onion (diced) • 2 medium tomatoes (chopped) • Juice of 1 lime • Half cup corn kernels (frozen and thawed or fresh) • 1-2 green jalapeño (seeded and diced) • Half cup chopped, fresh cilantro • 1/2 tsp salt, or to taste Notes: these measurements will yield about 1 cup of salsa Additional toppings: chopped green onion, pepitas (did you know these are pumpkin seeds? because I just found out a few months ago), cheese of choice Directions: Bake the potatoes: -Oven method (approx 45-60 min): Preheat to 400 degrees. With a fork, pierce the skin of your potatoes all over. Place the potatoes on a lined baking sheet, and bake until tender. -Microwave method (approx 8-10 min): With a fork, pierce the skin of your potatoes all over. Place on a microwave safe plate and nuke (I hate that word) until tender. **caution, your plate will be HOT as HELL when done** Make the salsa: Combine all of the salsa ingredients in a bowl. Allow everything to marinate while you’re baking the potatoes. The lime juice and salt are going to soften up the onions and help all of the flavors come together Kale: Heat oil in a skillet over medium high heat. Once hot, add the kale and seasonings. Stir every so often, until soft. Beans and avocado: Rinse beans and season with a dash of garlic powder and chili powder. Slice avocado Once your potato is cool enough to touch, slice it down the middle and top with kale, beans, salsa, avocado. Enjoy :) |

Hi! I'm Shantal.
Categories
All
|

 RSS Feed