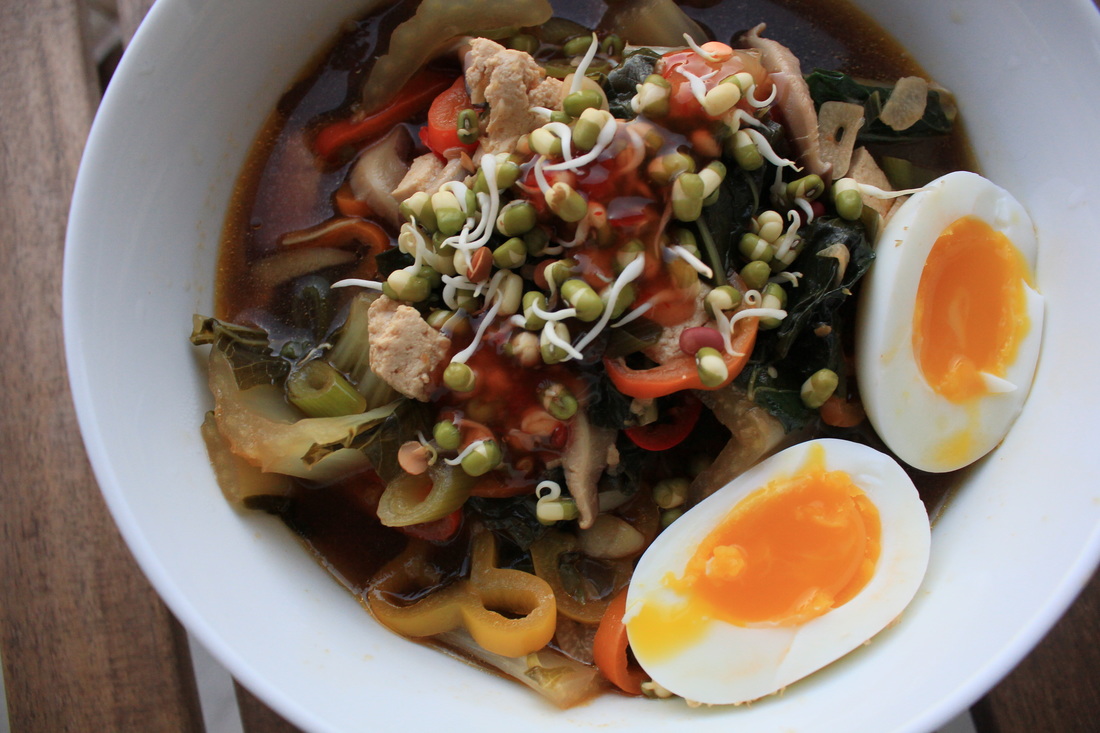
 I don't know if this will only resonate with my ~women out there~ but do you ever have those sore, achey, tired, and lazy days that just call for soup? Like only soup. Those days that are so long and trying that the only thing you can fathom doing after work is sitting on the couch and eating a big, warm, tasty, comforting, bowl of soup? Likewise, are you that kind of person who wants to indulge in emotional comfort eating but also get your greens in? If so, continue reading.
This ramen recipe is simple, straight forward, quick, and totally satisfying. It's also as customizable as you want it to be, which is my favorite kind of recipe. The final product is tasty, warming, and nourishing, and just as impressive as the restaurant version, even without the artistic presentation of the vegetables as it's normally served. That's why I call this "lazy" ramen- you're gonna kick it old school and just dump your soup into a bowl and enjoy. Click the link below to continue reading!
8 Comments
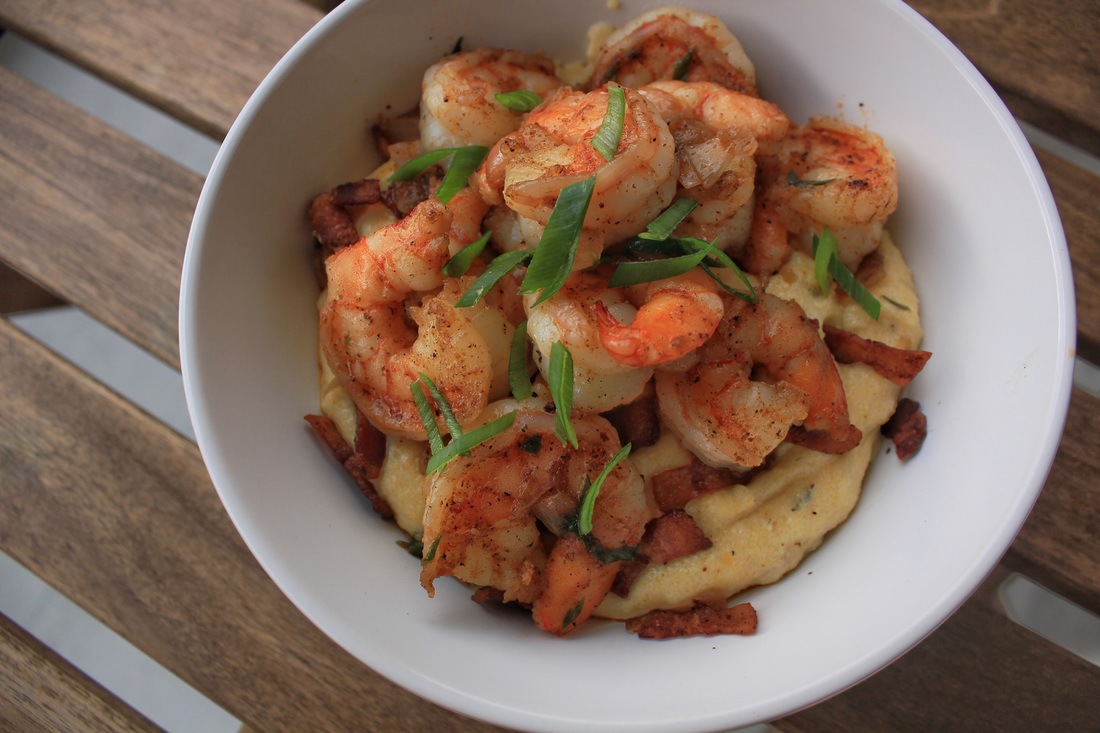 Let that sink in. Creeeeamy grits with crispy bacon and caramelized corn (cooked in the bacon fat, hello!) topped with cajun shrimp and shallots. Hello, I said. Hello.
Serves: 2 Cook Time: 25-ish minutes Adapted from Wendy Weekend Gourmet Ingredients: ***Can be made dairy-free by omitting cheese (the corn adds hella flavor anyway) and subbing half & half with dairy-free milk of choice (I prefer almond)*** • 3 slices of bacon, chopped • 1 cup frozen corn, thawed • 1 cup chicken stock (or veggie for my pescetarian frenz) • 1 cup half & half • 1/2 cup yellow cornmeal • 3/4 cup shredded cheddar cheese • 1 tbsp coconut oil • 2 shallots, diced • 2 green onions, finely sliced on the bias (plus more for garnish, if desired) • 1 lb shrimp • 1 tbsp cajun seasoning • 1/2 tbsp thyme • 2 tbsp dry white wine (optional) • Freshly cracked black pepper and salt to taste Directions: • Heat a large skillet over med-high heat. Once hot, add bacon and cook until crispy, stirring occasionally. Remove bacon and set aside. • Drain all but 1 tbsp of the bacon grease and add the corn. Cook for 5-8 minutes, or until corn is golden brown and bacon-y. Stir occasionally. Once browned, remove corn and set aside. • In a medium sauce pot, add half & half and chicken stock. Bring to a boil and slowly whisk in the cornmeal. Lower heat to low and continue whisking until cornmeal is incorporated. Add salt, pepper, thyme, corn, and cheddar cheese, and cook until cornmeal has thickened. Honestly, this could take anywhere from 30 seconds to 10 minutes. Don't ask me why. I think it has something to do with how hot your milk and stock are. I'm not a scientist, though. Note: add more milk as needed if grits get too thick. you want them to be nice and creamy. • While the grits are cooking, add coconut oil to the same skillet that you cooked the bacon in, and heat over med-high heat. Once hot, add shallots and green onions, and cook until shallots are translucent, about 30-45 seconds. Add white wine and cook down for 30 seconds, then add shrimp and cajun seasoning. Season with salt and pepper as needed. • Cook shrimp until pink, about 3-4 minutes per side, and remove skillet from heat. • Pour a hearty bowl of grits, sprinkle generously with bacon, and top with a heaping helping of shrimp (make sure to get the shallots and green onions in there). Top with fresh green onion and serve hot. ENJOY! 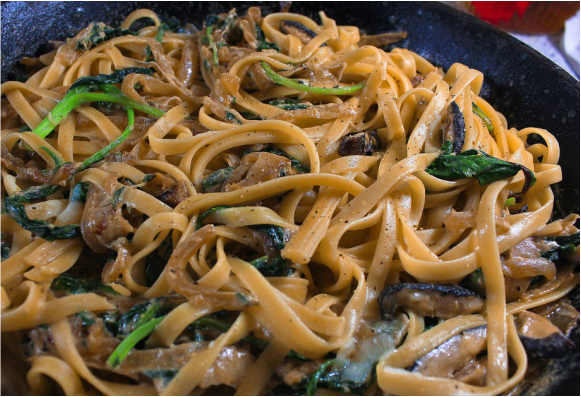 Man, this pasta is BOMB. It's creamy and hearty with a hint of sweetness from the caramelized onions, and a delicious earthy note from the mushrooms. My secret is that I use dried mushrooms when I make this pasta. Don't be intimidated by dried mushrooms- they can be found in any grocery store, usually right next to the fresh mushrooms or in the canned foods aisle, and just require 1 or 2 more steps than when working with fresh mushrooms. Of course, you can totally use fresh shroomies, but I love using the dehydrated puppies because their flavor is more concentrated, and the rehydrating liquid adds amazing depth to the cream sauce. The results are tremendous! When paired with a nice, full bodied red wine, this dish is the ultimate comfort food. Also pairs well with Netflix and a Saturday night in.
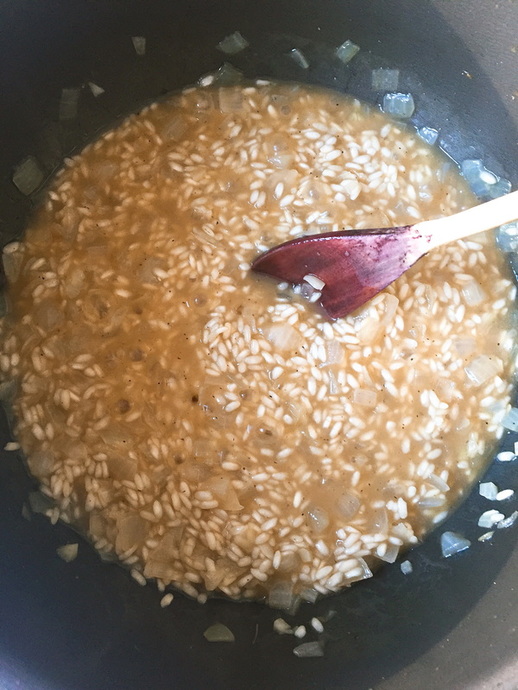
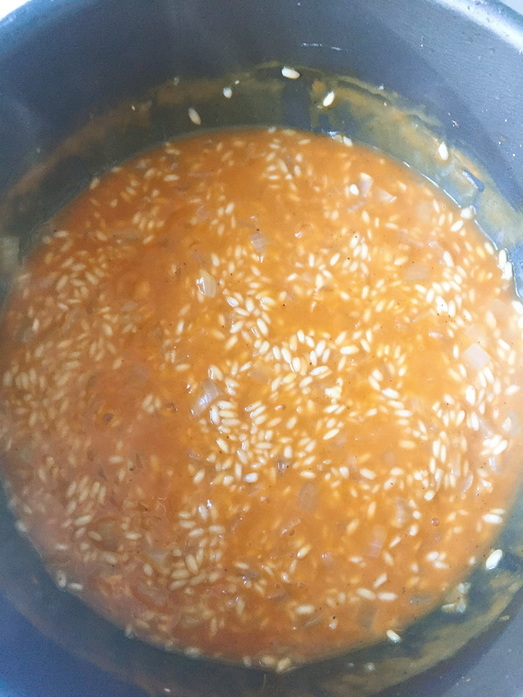
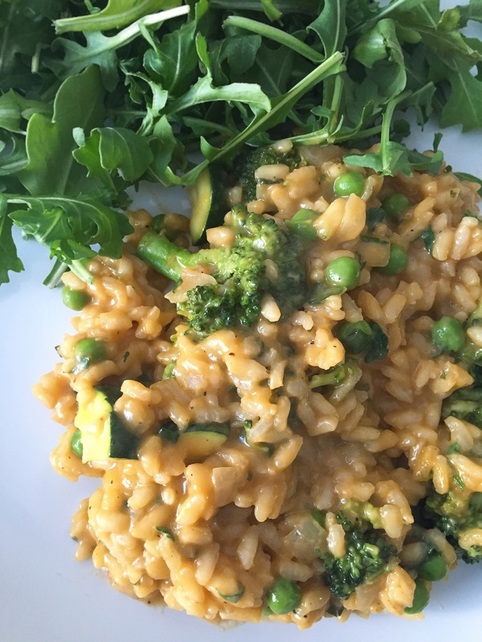 Yeah, you heard me. I said carrot purée. If you guys know me by now, you know I love sneaking in extra vegetables where I can. And if it adds more color, it's a win win. This risotto is rich, creamy, aromatic, and has just a hint of sweetness from the carrot purée. It pairs really nicely with a simply arugula salad (and a crisp glass of white wine), and is always impressive to guests. The only problem with risotto is that it doesn't really reheat that well, so you're just gonna have to finish this whole thing tonight :) A lot of people have this misconception that making risotto requires a higher level of skill, but honestly, it's one of the easiest things you can make- it just requires your near-undivided attention. I think the babysitting aspect of making risotto is what deters most people, but I find it to be extremely therapeutic. The heady scent of white wine and onions cooking together will fill your kitchen and make you feel fuzzy inside, and there is something so calming about the repetition of stirring and ladling, stirring and ladling, stirring and ladling.... see what I mean? *Kitchen Tip* I've found that the best way to make risotto is with a glass of wine in your free hand... ;) Have I mentioned I like wine? But really, you deserve it. You're going to be standing at the stove for an hour- treat yourself. 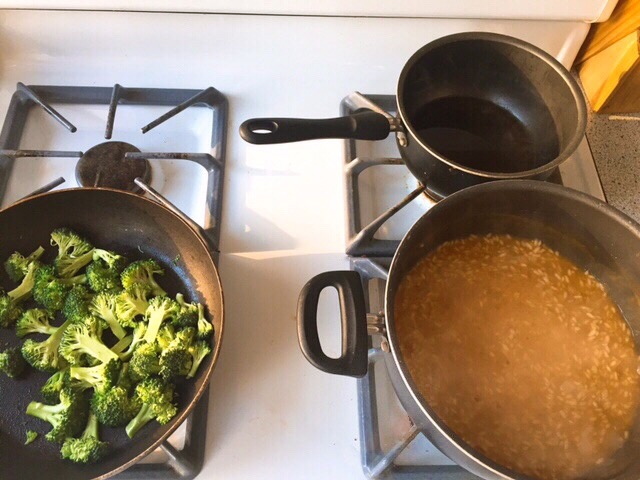 It's important to always keep your broth at the same temperature as the rice. As the rice continues to cook and absorb the broth, it will puff up and release its' starch, which is what gives risotto that signature creaminess. Adding liquid that is too cool will reduce the risotto's temperature, interrupting the cooking process and causing the risotto to cook unevenly.
  Ingredients:
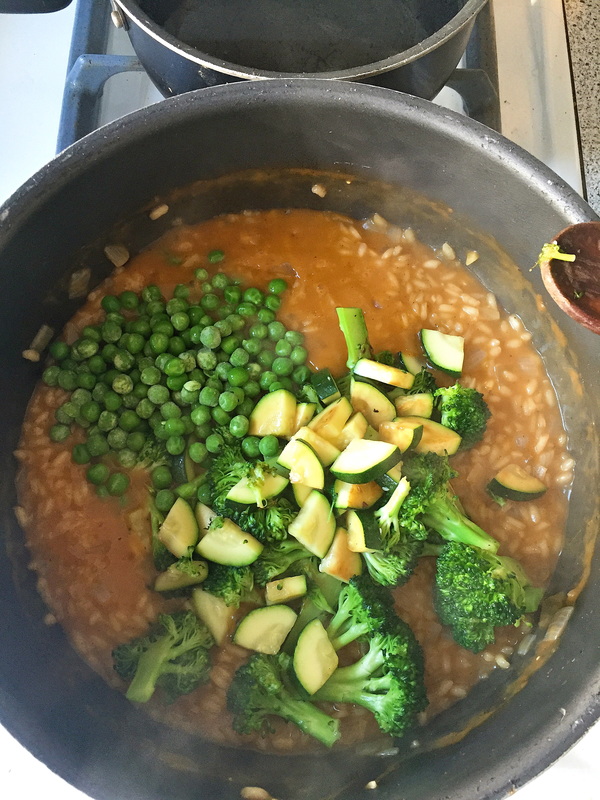
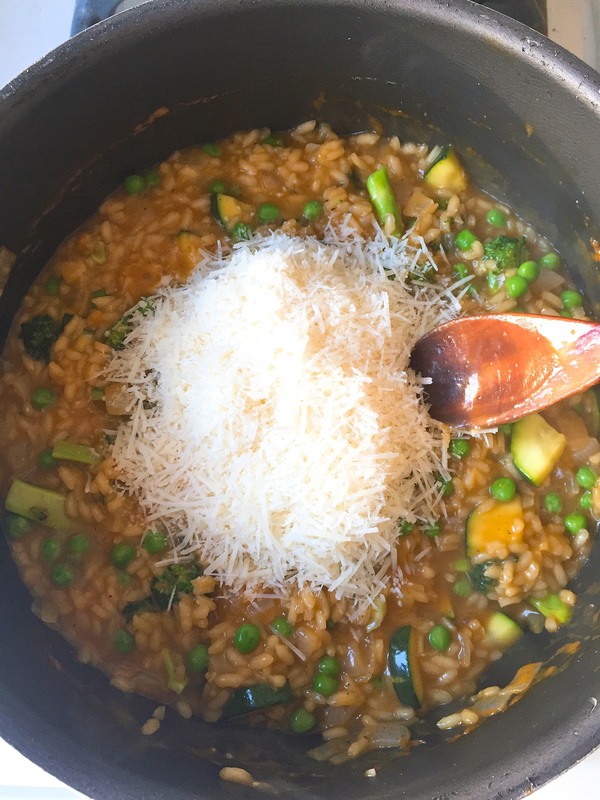
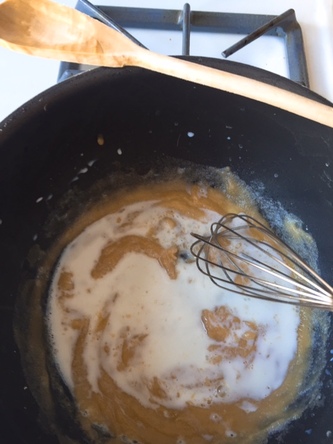
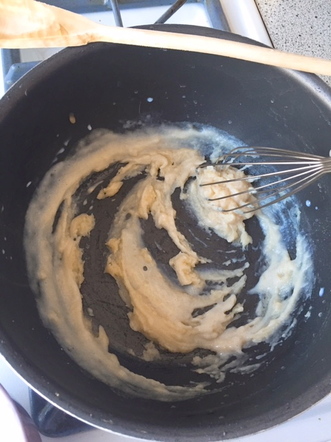
• 1 1/2 cups Arborio rice (uncooked) • 4 1/2 cups vegetable stock (in general the larger cartons of stock are about 32 oz. Feel free to use water for that last 1/2 cup) Note: you may need more or less broth • 1 cup white wine (plus more for you) • 1 small onion (chopped) • 3 garlic cloves • 3 tbsp butter • 4 carrots (chopped in large chunks) • 1/3 cup frozen sweet peas (thawed) • 1 cup of broccoli (cut into florets) • 1/3 cup zucchini (diced) • 1 cup grated parmesan • 1/4 cup flat leaf parsley (finely chopped) • 1 tbsp olive oil • Salt and cracked black pepper (to taste) Directions: **Be sure to have all ingredients measured out and chopped up before you start the risotto** • Start with your purée. Add carrots, water (just enough to cover the carrots), and a pinch of salt to a small saucepan. Bring to a boil and allow carrots to cook until tender. Saving the liquid, remove the carrots and add to a blender or food processor. Add about 1/4 cup of the cooking liquid and blend until smooth. Add about a tbsp of cooking liquid as necessary, until carrots have reached the right consistency. It should basically have the consistency of baby food- very smooth, but not too watery. Set aside when done. • Heat the broth in a small saucepan until the liquid starts steaming. Adjust heat as necessary to keep the liquid hot, without simmering, as you cook the risotto. • Over medium heat, melt the butter in a large pot. Add onions and cook down until translucent, about 4 minutes. Add salt, pepper, and garlic. Cook until fragrant, about one minute. • Add the rice, and give it a few stirs so that the butter covers all of the grains. Let the rice toast for about a minute, stirring occasionally. • Add wine, inhale the AROMA, and let cook until most of the liquid is absorbed. Note: throughout the duration of this process, you will be adding liquid and cooking down until most, not all, is absorbed. You always want a thin layer of liquid covering the rice. • Add a ladleful of broth (about 1/2 cup) and continue to stir occasionally until most of the liquid is absorbed. Continue to repeat this process until you've added half of your broth. • At this point, add in your carrot purée, and with that same method, stir occasionally until most of the liquid has been absorbed. Then return to ladling in the broth. Continue doing this until your risotto is creamy and al dente. • While your risotto is cooking, heat a tbsp of oil in a non-stick skillet. Add broccoli, with a pinch of salt, and sauté until bright green. Add zucchini and continue to sauté until tender. I like to get a little sear on the zucchini as well. Remove from heat and set aside. • Once risotto is done, add in your broccoli, zucchini, peas, and parsley. Stir to combine and cook for about a minute, allowing all of the flavors to come together. • Add parmesan and stir until cheese has melted • Season with more cracked black pepper. Taste before adding any extra salt- parm is salty on its' own Serve immediately! Guys. This is my no-fail, go-to, melty mac & cheese. I make it for every holiday, so I guess it's become my "signature dish." I bake it in the oven just long enough that the top layer gets a little crispy and seals in all the oozing, gooey cheese underneath. Y'all all know you love mac & cheese, so I'm not gonna even try to sell this one to you. Just keep reading if you want to learn how to make perfect mac & cheese EVERY time. First, you gotta make a roux. This is what will make your mac & cheese niiice and rich and creamy. In a large sauce pan, melt your butter until it starts bubbling, then add in your flour and whisk vigorously to remove all clumps. 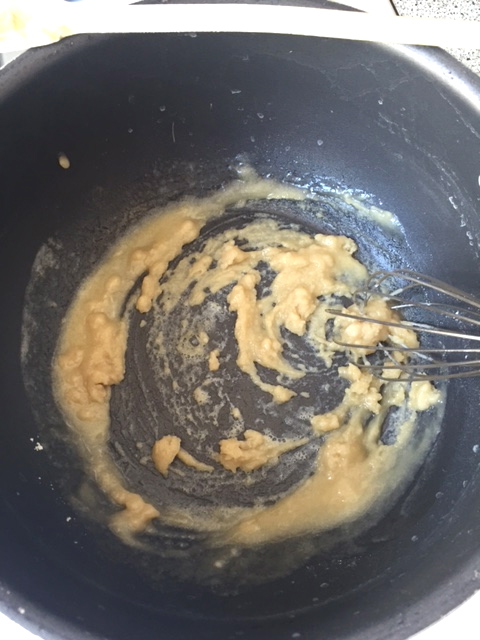 Once your flour is totally incorporated and has gotten nice and brown (a process that takes no more than a minute), you'll start whisking in your milk and cream. I like to add just a few tbsp at first, which makes it easier to blend. Whisk til smooth, then add the remaining milk and cream slowly, while whisking quickly and continuously.
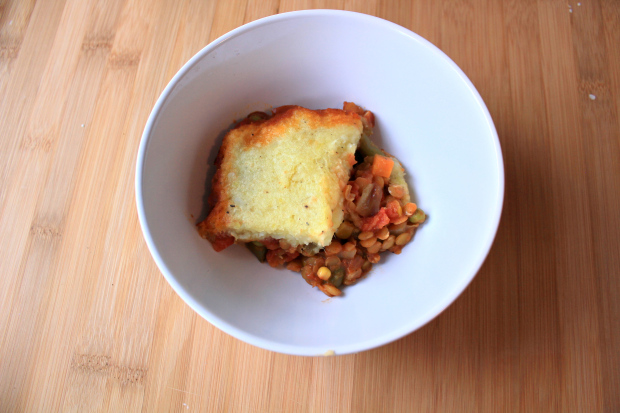
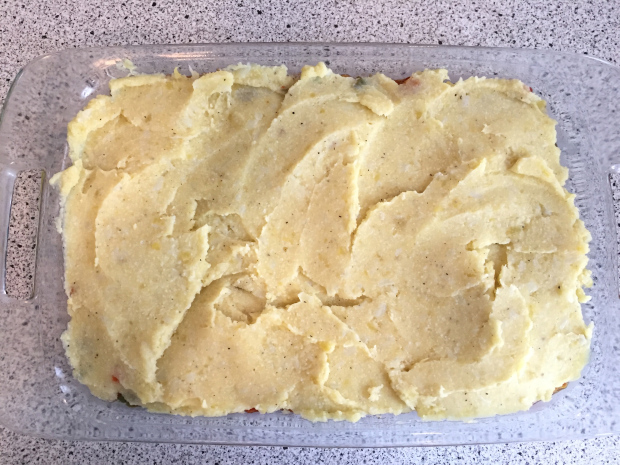
Thennnn, you're gonna add the cheese. I like to use several different kinds. 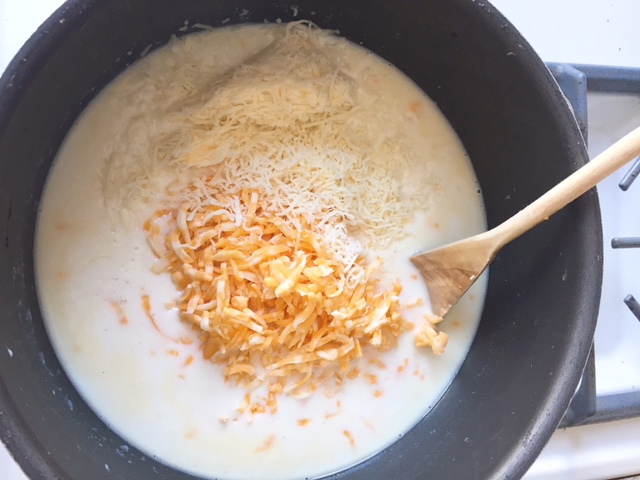 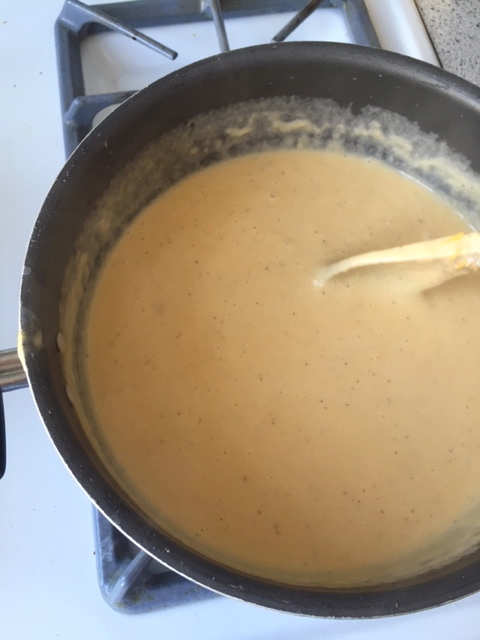 Once your cheese has melted and your sauce has thickened, you'll pour it over your pasta (which will already be waiting for you in a greased dish), and then pop it in the oven! While it cooks, your kitchen (or entire 1 bedroom apartment) will be filled with the intoxicating smell of warm, bubbly cheese. It is torture. Praying for you. But when it's done, you'll have this. A beautiful, crisp top layer covering miles and miles of melty cheese and pasta. Ugh. I just love it so much. 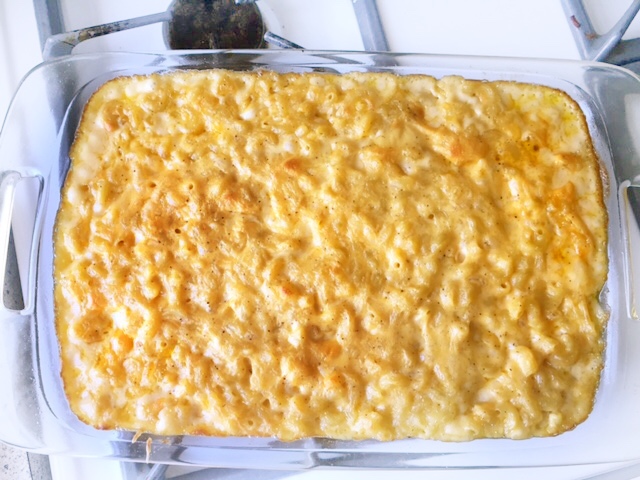 Ingredients (makes approx 4 servings. I usually triple this to serve 8-10 for holidays..shown above): • 1.5 cups elbow macaroni • 3 tbsp butter • 3 tbsp all purpose flour • 2 cups milk and half & half combined • 1/2 tsp salt (or more, to taste) • 1/2 tsp ground black pepper (or more, to taste) • ***secret ingredient*** 1/2 tsp mustard powder (trust me! it adds this bite that you just can't get with anything else) • 2 cups shredded cheese (I use cheddar, colby jack, and 6 blend Italian) Directions: • Preheat oven to 350 degrees, and bring a large pot of salted water to a boil. Cook pasta for 10 minutes (just under al dente). Once cooked, drain and transfer to a greased dish (about 8" x 10") • Over low/medium heat, melt butter • Add flour by the tbsp and whisk until totally incorporated. Let cook until browned and bubbly (no more than a minute) • Gradually pour in milk/cream and whisk continuously to avoid clumps • Add in your cheese, salt, pepper, and mustard powder, and stir to combine. Allow cheese to melt and sauce to thicken, stirring occasionally • Once thickened, *carefully* taste the sauce to make sure it's seasoned well, add more salt and pepper if necessary, and then pour sauce over pasta, and bake for about 25-30 minutes, until bubbling and golden brown That's all, folks! Note: you'll bake your mac & cheese for more or less time, depending on how deep your dish is. About 25-30 for a 2 inch dish. Note: feel free to manipulate the bake times depending on how funny you like your mac & cheese. I personally like mine a little firmer. Sterling moved to Chicago from Dallas in November of 2013. It snowed the day he got here, and continued to snow through the end of May. Yes, May. That January, we got down to -40º with the wind chill. Now, some of you tough guys may be thinking “that’s not thaaat bad” (which you are wrong), but we also lived next to the lake at the time…if you don’t know what lake effect cold is like, I am glad for you. That shit slices through your bones. So anyway, the day it hit negative 40, a pipe burst in our building, shutting off our hot water. Fortunately, my parents only lived about 30 minutes from us, so we drove to their house to shower, and returned home around 8 pm. Soon after settling on the couch, we noticed our vents were blowing out cold air. We called the building to find out that a second pipe had burst, subsequently eliminating our hot water AND heat. I remember we were standing in our bathroom with the door closed, in winter coats, blowing hot air on ourselves with my hair dryer. We got into bed (in full sweatsuits, with SOCKS, God help me), rolled ourselves into a 3 blanket burrito, said our potentially final “I love you’s” and prayed to see another day. Needless to say, we ended up making it through the night and lived to tell the tale. OH, I forgot to tell you the best part of the story….While this was all happening, we were on day 2 of a f*ckin JUICE CLEANSE!!!! So we’re over here cold, malnourished, and shaking, drinking kale and rationing off portions of raw, unsalted almonds- which I had to allow as a safety precaution. Lowkey I wanted to quit, but Sterling, the competitive D1 athlete that he is, decided we needed to finish the cleanse as a demonstration of “mental toughness.” Bless him. So anyway, we’ve had a VERY mild winter this year, especially compared to what we experienced a couple years ago, but it is still chilly and I do find myself craving a warm meal at night (followed always by froyo.. I cannot be tamed), and this one hit the spot. One of my favorite things to do is to find ways to take traditional meat-based recipes and create a vegetarian version that we can both eat. While no dish will ever taste like real meat, you can still create some really filling and satisfying meals that do taste amazing, and this vegan Shepherd’s Pie is one of them! 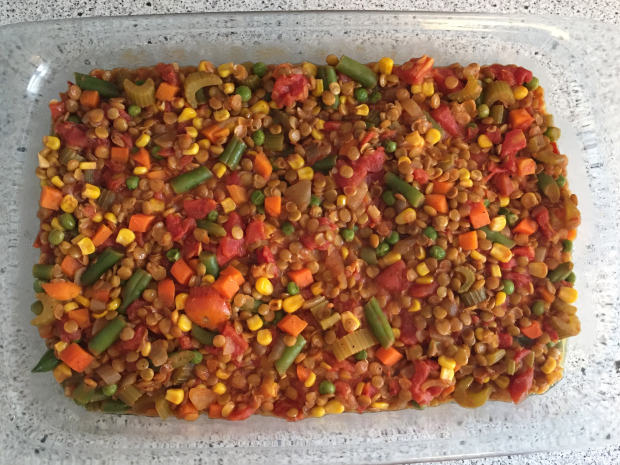 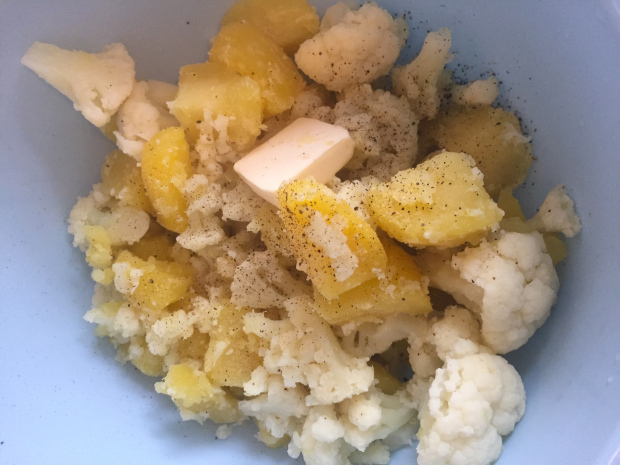 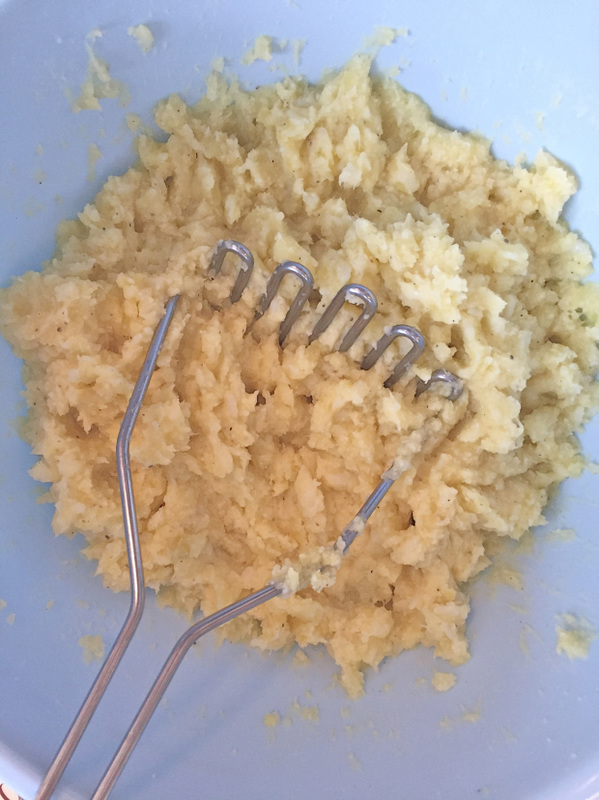 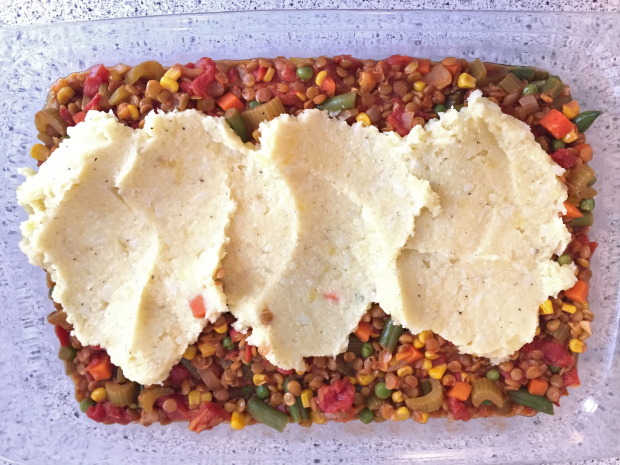
 Ingredients:
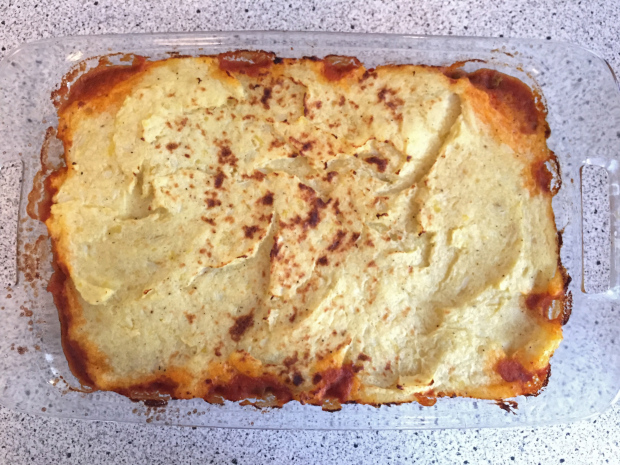
Filling: • 1 tbsp olive oil • 1 medium onion (diced) • 2-3 cloves garlic (minced) • 1.5 cups uncooked brown or green lentils (rinsed and drained) • 1 cup celery (chopped) • 1 (14 oz) can diced tomatoes • 1 (10 oz) bag of frozen mixed veggies: peas, carrots, green beans, corn Note: Green beans and corn are not used in traditional Shepherd’s Pie. I actually only used these because my grocery store was out of solo frozen peas, so I just grabbed this bag. It does amp up the veggie content, which never bothers me, but feel free to omit of you want to stay more traditional. In that case, you’d use 2-3 chopped carrots and about a cup of peas. • 3 cups vegetable broth • 2 tsp dried thyme • 2-3 tsp paprika • 2-3 tsp ground cumin • 1 tsp garlic powder • 1/2 tsp ground black pepper • Salt to taste Mashed Cauliflower and Potato Topping • 4 small yukon potatoes (peeled and quartered) • Half of a large head of cauliflower (cut into florets) • 2 tbsp vegan butter (I use Earth Balance) Note: you can obviously use regular butter if you want. I just wanted to keep the whole thing vegan. Note: no, I am not vegan actually • 1 tsp garlic powder • 1/2 tsp ground black pepper • Salt to taste Directions: • Heat oil in a large, non-stick skillet • Add onions and celery, and sauté until tender • Add canned tomatoes, lentils, veggie broth, thyme, paprika, cumin, garlic powder, and pepper. Bring to a boil then reduce heat and let simmer until lentils are tender (about 20 minutes, give or take). If lentils are still firm, add more water or veggie broth in 1/4 cup increments until tender Note: DO NOT ADD SALT AT THIS STAGE. When added to raw lentils, salt actually makes them firm up. Add salt AFTER lentils have cooked • While lentils are cooking, preheat oven to 400 degrees. Add potatoes and cauliflower to a pot of salted water. Bring to a boil, then reduce heat and let simmer for 14 minutes. Drain and add to a large mixing bowl. Add butter, garlic powder, salt and pepper, and mash until smooth. • Once lentils have cooked, add your frozen veggies and mix to incorporate. Let simmer for about 3-5 minutes or until veggies are heated through • Add lentil mixture to a greased 9×13″ dish and spread the potato/cauliflower mixture over top. Bake for about 15 minutes, or until topping has slightly browned and mixture is bubbling Enjoy! |

Hi! I'm Shantal.
Categories
All
|

 RSS Feed