|
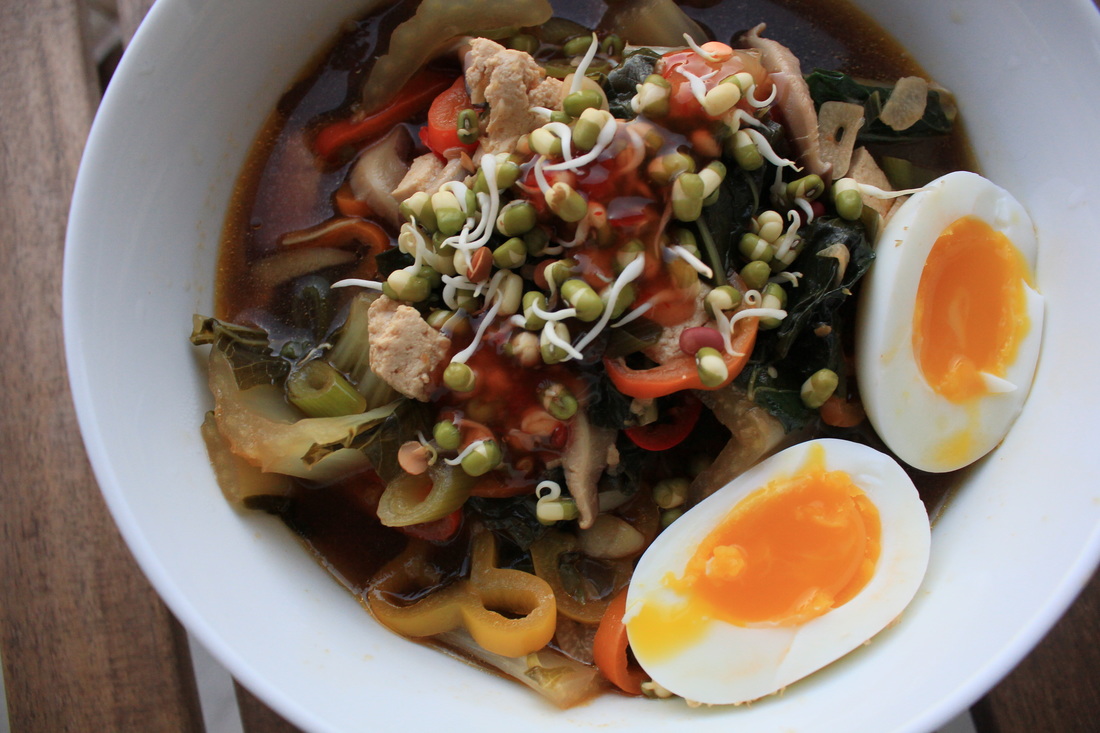
I don't know if this will only resonate with my ~women out there~ but do you ever have those sore, achey, tired, and lazy days that just call for soup? Like only soup. Those days that are so long and trying that the only thing you can fathom doing after work is sitting on the couch and eating a big, warm, tasty, comforting, bowl of soup? Likewise, are you that kind of person who wants to indulge in emotional comfort eating but also get your greens in? If so, continue reading.
This ramen recipe is simple, straight forward, quick, and totally satisfying. It's also as customizable as you want it to be, which is my favorite kind of recipe. The final product is tasty, warming, and nourishing, and just as impressive as the restaurant version, even without the artistic presentation of the vegetables as it's normally served. That's why I call this "lazy" ramen- you're gonna kick it old school and just dump your soup into a bowl and enjoy. Click the link below to continue reading!
8 Comments
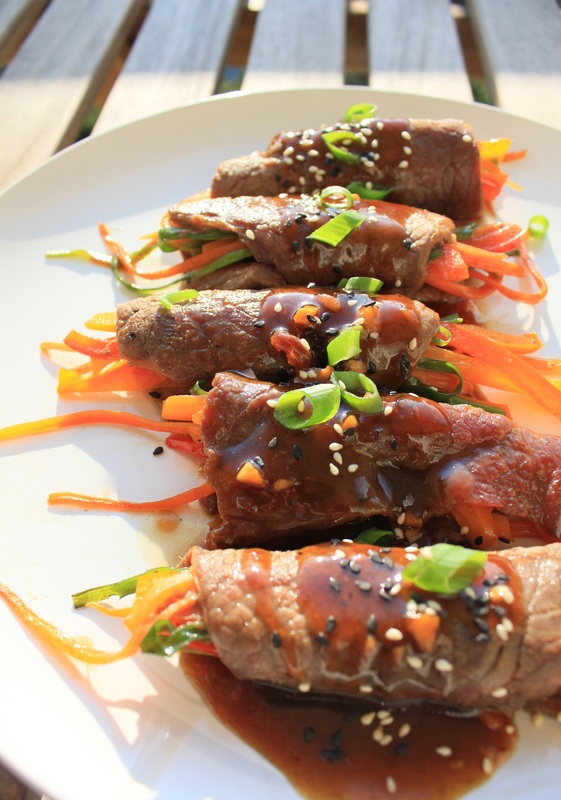
I love weekend dinners at home. I like to use the extra hours to make some of Sterling's favorite meals that take a little longer to make than week nights allow. Today we started our day with some errands and a hike up Stone Mountain, and then spent the afternoon relaxing and watching our favorite show, Power, while I made these veggie steak roll ups with a sweet soy mirin glaze. It was a great ending to a great weekend.
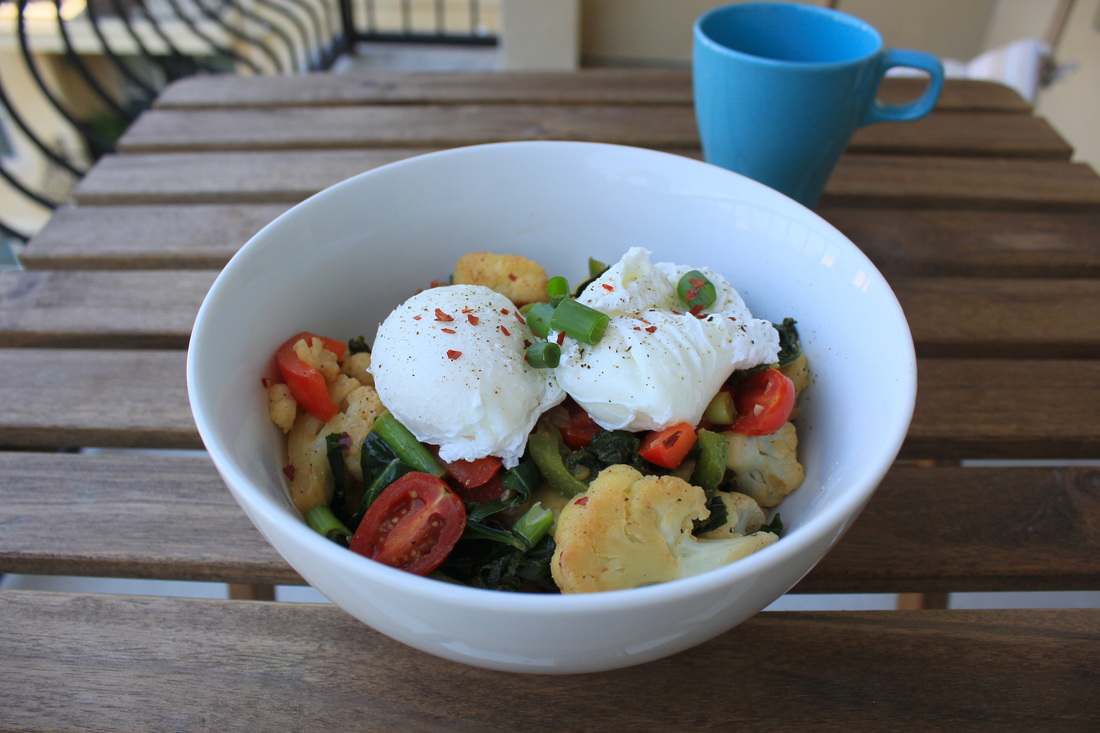
Serves: 2 Cook Time: 15 min, plus 2 hours to marinate (or at least 20 min) Ingredients: For the veggie steak roll ups • 3/4 lb thinly sliced sirloin • 1 large red pepper, sliced into matchsticks • 1 large orange or yellow pepper, sliced into matchsticks • 1 large carrot, julienned • 4-5 green onions, thinly sliced in long strips • Salt and pepper to taste • 1/2 tsp coconut sugar or light brown sugar Tools: julienne peeler (optional, may manually cut carrots into matchsticks but it's annoying and a lot of my recipes require a julienne peeler so just get one they're inexpensive), toothpicks. For the Soy Mirin Glaze • 3 garlic, diced • 2 green onions, sliced thinly on the bias, plus more for garnish • 1/2 cup olive or vegetable oil • 1/4 cup low sodium soy sauce • 1/4 cup mirin plus 1 tsp for later • 3 tbsp honey • 1 tsp ginger (freshly grated or tubed) • 1/2 tsp each white and black sesame seeds (for garnish, optional) • 1-2 tsp ground red pepper powder (optional, for heat) Directions: • Pat steak dry and place in large, shallow dish. Combine all glaze ingredients and pour over steak, covering completely. Cover dish and refrigerate for 1.5 hours, then remove and bring to room temperature for 15-30 minutes. • Heat half a tsp of olive oil in a nonstick skillet over medium-high heat. Once hot, add carrots and cook for 1-2 minutes, until they begin to soften. Add peppers and cook another minute. Add green onions, then season with salt and pepper, 1 tsp of mirin, and coconut/brown sugar. Remove veggies from skillet and just slightly increase heat. • Remove steaks from dish and arrange on a cutting board- RESERVE the sauce for later. Lay a small bundle of veggies at most narrow end of steak, then roll tightly tightly inward toward wider end. Secure with toothpicks. Starting seam side down, cook steaks for 2-3 min on each side, or until desired doneness. Remove steaks from skillet and reduce heat to medium. • Add sauce to skillet and cook until liquid starts to boil, stirring occasionally. Once boiling, reduce heat to medium-low and continue to stir frequently until thickened. Remove from heat. • Remove toothpicks from steak roll ups, then spoon sauce over top. Sprinkle with sesame seeds and more green onion. • Serve hot and enjoy! I feel like an angel when I eat this breakfast. It's so nutritious, filling, and satisfying that it keeps you feeling revitalized and full for hours. It's an awesome post-workout breakfast, but also a great hangover helper. The cauliflower does a good job of satisfying your meat and potato needs- it lends that hearty, carby quality I personally crave in a breakfast. Please note that the eggs are crucial here- the thick yolk gives the veggies a creamy and decadent texture. This breakfast is so so good... I shouldn't have to cook for free.
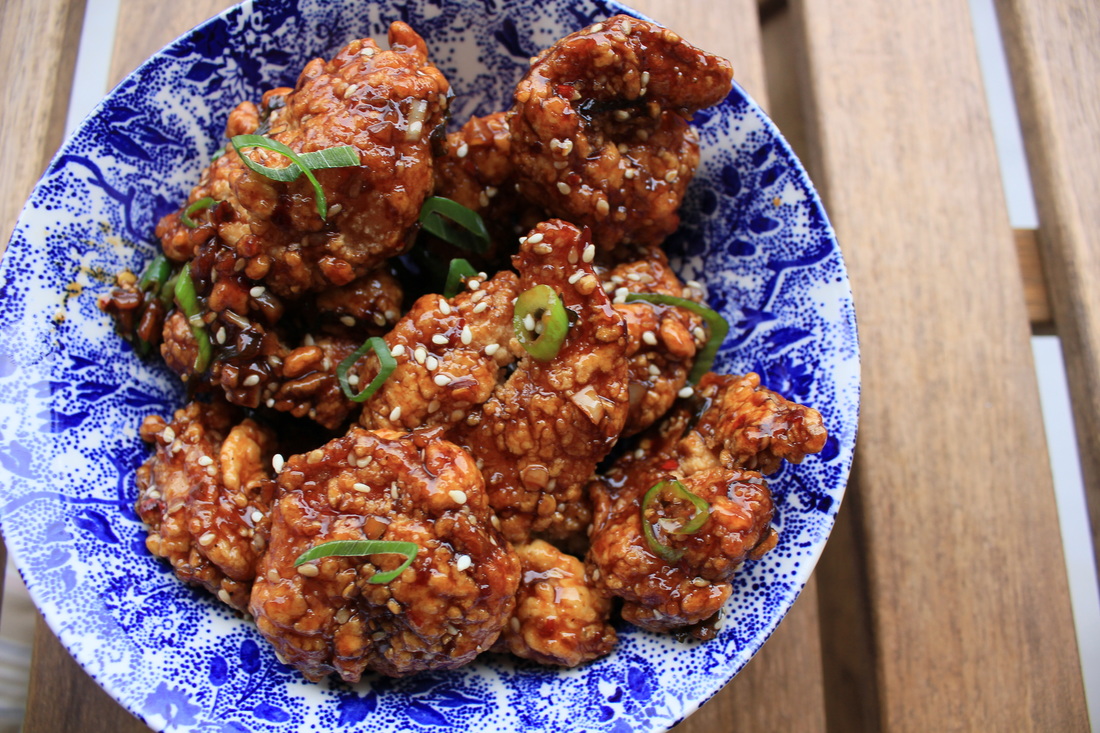
Serves: 1 Prep time: 5 minutes Cook time: 20 minutes Ingredients: • 2 eggs • 1/4 cup onions, sliced in half inch pieces • 3/4 cup red or green pepper, chopped in half-inch pieces • 1/2 cup cherry tomatoes, sliced vertically • 2 cups hearty greens (I used kale and collard greens), chopped • 2 cups cauliflower florets, in bite sized pieces • 2 tbsp green onion, chopped • 2 tsp rice vinegar • 1.5 tsp garlic powder • Crushed red pepper flakes • Salt and pepper to taste • Cracked black pepper (optional) • 1 tbsp olive oil Directions: For the veggies: • In a nonstick skillet or wok, heat half tbsp olive oil over medium high heat. Once hot, add onions and cook until they start to color (about 2 minutes), then season with salt and pepper and add cauliflower. Season with half tsp garlic powder and cook for 5-6 minutes, or until cauliflower are tender. Add more olive oil as needed. • Reduce heat to medium. Add greens and season with salt, pepper, and half tsp garlic powder. Continue cooking until greens have wilted and released most of their moisture (about 3 minutes). Season with 1 tsp rice vinegar and cook another minute. • Add peppers, and season with salt and pepper to taste. Cook another 3-4 minutes, or until peppers are tender, then add tomatoes. Season with remaining garlic powder, and salt and pepper to taste. Cook until tomatoes are tender. Like 2-3 min. • Add half of the green onions, stir, and turn off heat. For the poached eggs (this is my fool proof method): • While veggies are cooking, fill a small sauce pot with 2 inches of water. Pour egg into a small saucer and keep cold. • Bring the water to a gentle simmer over med-high heat (small bubbles should be rising to the top of the water, without actually causing the surface of the water to "roll" ya feel me?) • Once simmering, add 1 tsp each of rice vinegar (or white, if you don't have rice) and salt. With a spoon, quickly stir the water to create a cyclone. Pour the egg into the center of the cyclone, turn off the heat, cover the pot, and cook for 4 minutes and 45 seconds. Do not uncover until the time is up. Just trust the process, and me. Note: 4 min and 45 seconds will yield a thick and creamy, but runny yolk. less time will make a looser yolk, more time will make a firmer yolk. 'tis science. Another note: the vinegar helps to keep the egg whites together. vinegar is not necessarily crucial, but it is helpful. I use rice vinegar because it vaguely seasons the water. White vinegar is flavor neutral. • After desired cooking time, remove egg with a slotted spoon and place on a napkin to dry To assemble: Pour veggies into a bowl, top with poached eggs, season with freshly cracked black pepper, remaining green peppers, and crushed red pepper flakes to desired heat preference. Serve hot and enjoy! Alia is my mom and this is her recipe :) My mom's been making this recipe in chicken form since I was born. It was always the number 1 most requested dish for parties and BBQs, and my personal request for all holiday meals. Imagine crispy fried slices of chicken breast smothered in sticky, sweet, spicy, garlicky sauce. It was like crack. She'd make double batches so that I could have leftovers the next day, and I would always eat the leftover chicken cold- directly out of the tupperware because it was so good I wasn't willing to wait the 1.5 minutes it would take to heat up in the microwave. Well, in the summer of 2012, Sterling came to visit me at my parent's house in Chicago. My mom, the ultimate number 1 most gracious host and human on earth, knew that Sterling's favorite food was shrimp (in almost any form), and so, for the first time in 20 something years, made a shrimp version of her famous chicken. The game was changed forever. I've gone back and forth on whether I wanted to share this recipe. Part of me is like- this is my claim to fame... I get to say shit like "my mom makes the best shrimp you've ever had" and be right. Do I really want to give up those bragging rights? But, after much deliberation, I decided it's my responsibility as a good friend to share this with you. And ultimately, none of us can really make this as good as my mom, so might as well spread the love. Serves: 2 Prep time: 10 min Cook time: 15 min Adapted from my mom's recipe Ingredients:
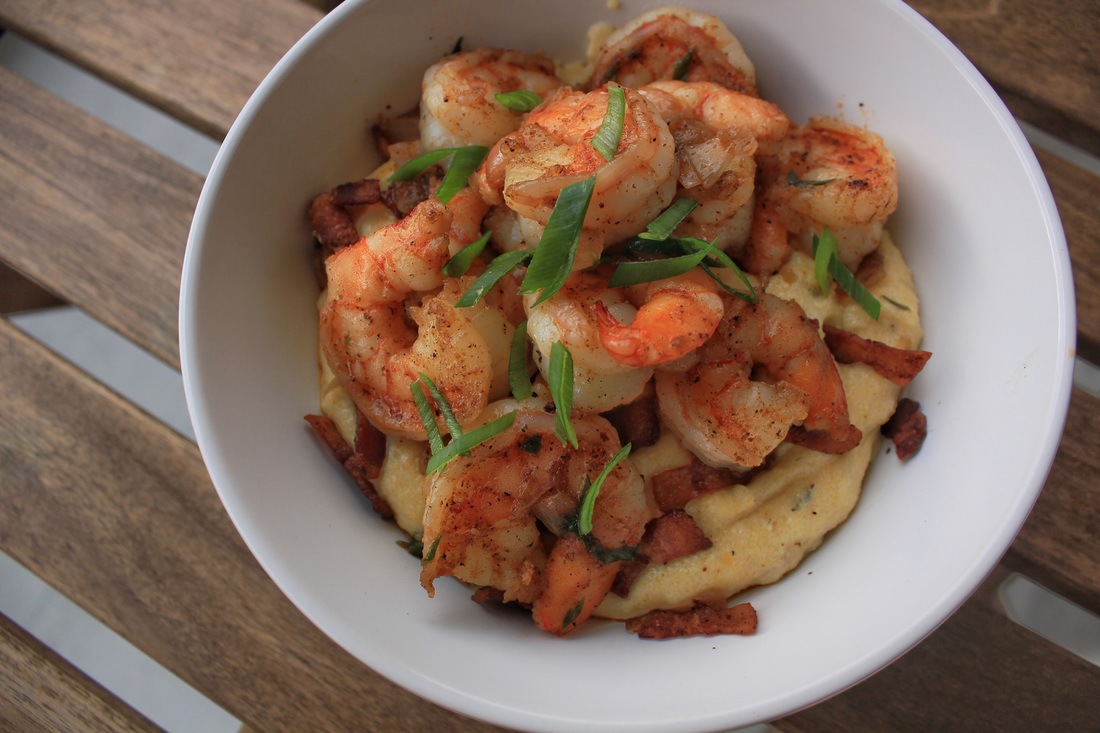
• 1 lb frozen raw shrimp (shelled, deveined, and thawed) • 1.5 cups cornstarch, plus 1 half tbsp • 2 eggs, beaten • 1/4 cup sesame oil • 1/2 cup soy sauce • 3 tbsp light brown sugar or coconut sugar • 1 heaping tsp green onion, plus more for garnish, thinly sliced on the bias • 1 tbsp sesame seeds, plus more for garnish • 1/2 tbsp crushed red pepper flakes • 1.5 tbsp garlic, minced • 1.5-2 cups vegetable oil, or enough to fill a pot 2-3 inches deep • 1 tsp coconut oil or sesame oil • Salt and pepper Directions: • In a large pot or wok, heat vegetable oil to 350 degrees. • While oil is eating, take cleaned shrimp and pat dry with a paper towel. Season with salt and pepper. • Add beaten eggs to a large mixing bowl and season with pepper. Add cornstarch to a separate large mixing bowl. Toss shrimp first in eggs, then in cornstarch until thoroughly coat. Add more cornstarch if necessary, until shrimps are all evenly and thickly coated. • Once the oil has reached 350 degrees, slowly add shrimp 1 by 1, and let fry for 5 minutes, stirring occasionally. Cook no more than 10 shrimp at a time (overcrowding will reduce the temperature of the oil). • Once shrimp are golden brown and crispy, remove with a slotted spoon and let drain on a lined plate. Repeat until all shrimp are fried. • Combine sesame oil, soy sauce, sugar, green onion, sesame seeds, and red pepper flakes. • While shrimp is cooking, heat tsp of oil in a large nonstick skillet over medium-high heat. Add garlic and cook until fragrant and golden. Add sauce mixture and bring to a gentle simmer, stirring frequently. • Combine half tbsp cornstarch with 1 tbsp of water. Stir into the sauce and let simmer until sauce thickens. Stir frequently, careful not to let burn. Reduce heat as necessary. Note: sauce is done when you can run a wooden spoon down the pan and draw a quick line through the liquid • Turn off heat, add shrimp, and stir to coat. Garnish with more sesame seeds and green onions and serve immediately. Goes GREAT with garlicky mashed potatoes and brussels sprouts... just sayin. Let that sink in. Creeeeamy grits with crispy bacon and caramelized corn (cooked in the bacon fat, hello!) topped with cajun shrimp and shallots. Hello, I said. Hello.
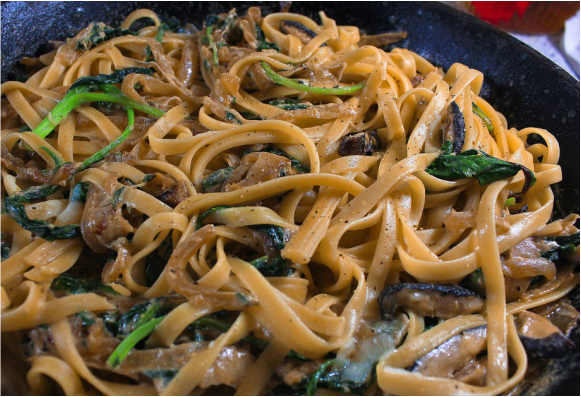
Serves: 2 Cook Time: 25-ish minutes Adapted from Wendy Weekend Gourmet Ingredients: ***Can be made dairy-free by omitting cheese (the corn adds hella flavor anyway) and subbing half & half with dairy-free milk of choice (I prefer almond)*** • 3 slices of bacon, chopped • 1 cup frozen corn, thawed • 1 cup chicken stock (or veggie for my pescetarian frenz) • 1 cup half & half • 1/2 cup yellow cornmeal • 3/4 cup shredded cheddar cheese • 1 tbsp coconut oil • 2 shallots, diced • 2 green onions, finely sliced on the bias (plus more for garnish, if desired) • 1 lb shrimp • 1 tbsp cajun seasoning • 1/2 tbsp thyme • 2 tbsp dry white wine (optional) • Freshly cracked black pepper and salt to taste Directions: • Heat a large skillet over med-high heat. Once hot, add bacon and cook until crispy, stirring occasionally. Remove bacon and set aside. • Drain all but 1 tbsp of the bacon grease and add the corn. Cook for 5-8 minutes, or until corn is golden brown and bacon-y. Stir occasionally. Once browned, remove corn and set aside. • In a medium sauce pot, add half & half and chicken stock. Bring to a boil and slowly whisk in the cornmeal. Lower heat to low and continue whisking until cornmeal is incorporated. Add salt, pepper, thyme, corn, and cheddar cheese, and cook until cornmeal has thickened. Honestly, this could take anywhere from 30 seconds to 10 minutes. Don't ask me why. I think it has something to do with how hot your milk and stock are. I'm not a scientist, though. Note: add more milk as needed if grits get too thick. you want them to be nice and creamy. • While the grits are cooking, add coconut oil to the same skillet that you cooked the bacon in, and heat over med-high heat. Once hot, add shallots and green onions, and cook until shallots are translucent, about 30-45 seconds. Add white wine and cook down for 30 seconds, then add shrimp and cajun seasoning. Season with salt and pepper as needed. • Cook shrimp until pink, about 3-4 minutes per side, and remove skillet from heat. • Pour a hearty bowl of grits, sprinkle generously with bacon, and top with a heaping helping of shrimp (make sure to get the shallots and green onions in there). Top with fresh green onion and serve hot. ENJOY! Man, this pasta is BOMB. It's creamy and hearty with a hint of sweetness from the caramelized onions, and a delicious earthy note from the mushrooms. My secret is that I use dried mushrooms when I make this pasta. Don't be intimidated by dried mushrooms- they can be found in any grocery store, usually right next to the fresh mushrooms or in the canned foods aisle, and just require 1 or 2 more steps than when working with fresh mushrooms. Of course, you can totally use fresh shroomies, but I love using the dehydrated puppies because their flavor is more concentrated, and the rehydrating liquid adds amazing depth to the cream sauce. The results are tremendous! When paired with a nice, full bodied red wine, this dish is the ultimate comfort food. Also pairs well with Netflix and a Saturday night in.
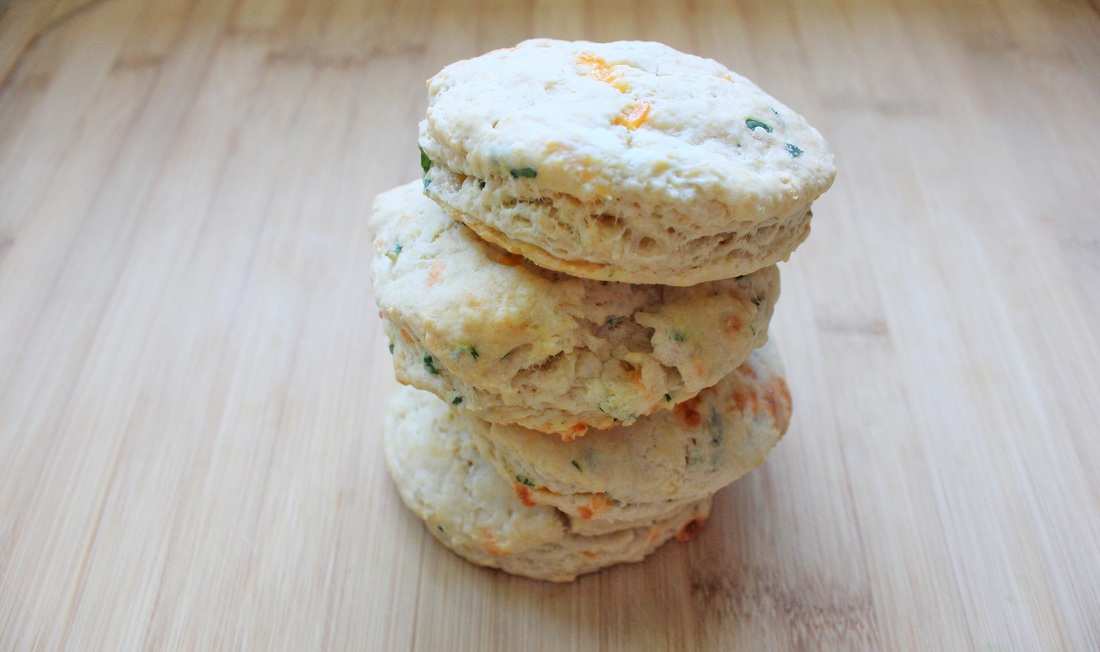
I woke up last Saturday feeling slightly hungover and seriously hungry. I knew I needed something hardy and carb-y to soak up the delightful mix of wine, champagne, and whiskey that I had drank the night before, but I also needed my food to taste great and fancy cuz what I really wanted was brunch, but was too tired to leave the apartment. I remembered recently seeing a recipe on Tastemade for scone breakfast sandwiches and decided to make my own version. These scones are flaky, buttery, and subtly cheesy. Elevated by the addition of fresh and dry herbs, they make the perfect base for a breakfast sandwich, but are also delicious on their own because they are sooooo flavorful. I topped mine with avocado and a fried egg. Sterls had his with butter. You truly can't go wrong no matter how you serve 'em. And, like always, they are easy as hell to make. Yields: 4 scones
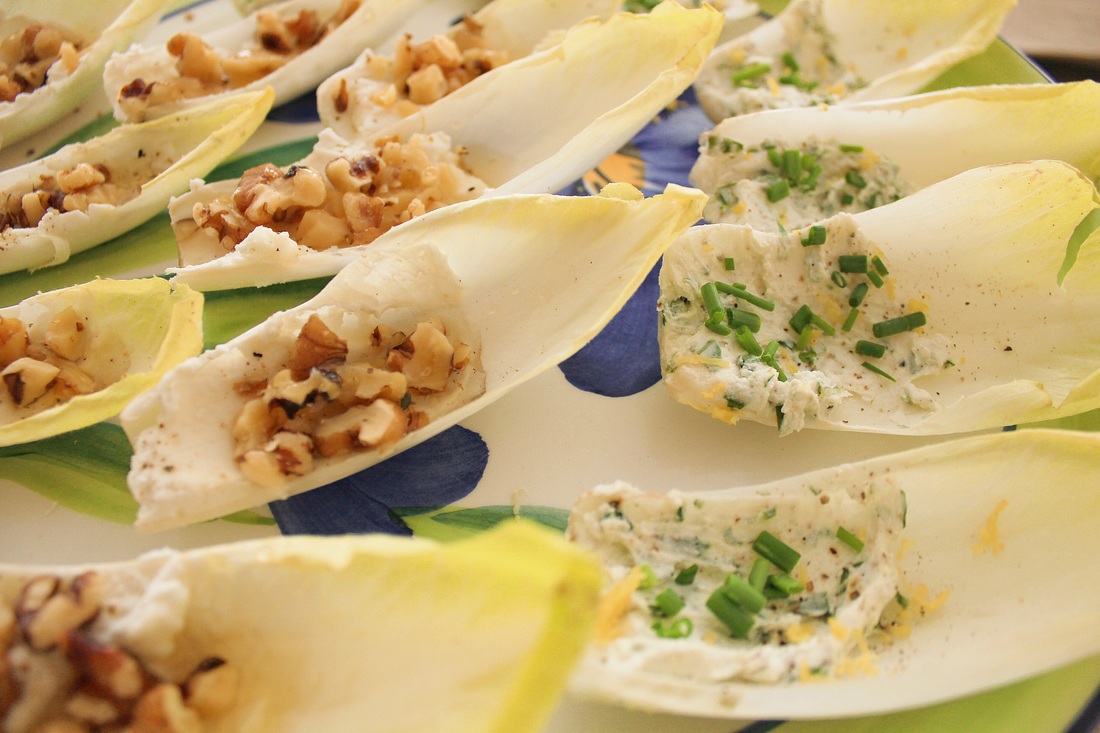
Cook Time: 20 minutes Ingredients: • 1 cup all purpose flour • 1.5 tsp baking powder • 1/2 tsp salt • 1/4 cup butter, cubed • 1/2 tbsp sugar OR 1 tsp stevia • 1.5 tbsp fresh chopped parsley • 1 tsp dried thyme, finely chopped • 1 heaping tbsp shredded cheddar cheese • 1 heaping tbsp grated parmesan cheese • 8 tbsp almond milk (adds a great mild nutty flavor, but dairy milk would be just fine) • Parchment paper Optional toppings: avocado, fried egg, jam (salty & sweet, hellooo), mo' butta, etc. Directions: • Preheat oven to 400 degrees and line a baking sheet with parchment paper • In a large bowl, combine flour, baking powder, salt, sugar/stevia, parsley, and thyme. Using your fingers, rub the butter into the flour until the butter is incorporated and the flour mixture is flaky. It's ok to leave small chunks of butter. • Add 7 tbsp of almond milk (you'll use the remaining tbsp later) and knead into the flour to form a dough. Onto a floured surface, pat the dough out to about a quarter inch thick. Use a cookie cutter or the rim of a drinking glass to cut out 2.5" discs, and place onto your lined baking sheet. • Brush with the remaining almond milk and bake for 12-15 minutes, or until golden brown. *A trick to knowing if your scones are done is to tap them at the center. If they sound hollow, they're done! This is a simple, elegant looking app that's easy to whip up. I love a good cheese plate, but I thought this would be a fun and unique alternative. I've made two versions here- goat cheese, honey, and walnuts (creamy, crunchy, sweet) and herbed goat cheese, chives, and lemon zest (salty, savory, herbaceous). I'll never say "herbaceous" again, I promise. Anyway, I think the...herby... one would be GREAT with pomegranate, but allegedly they were out of season when I made these, womp womp.
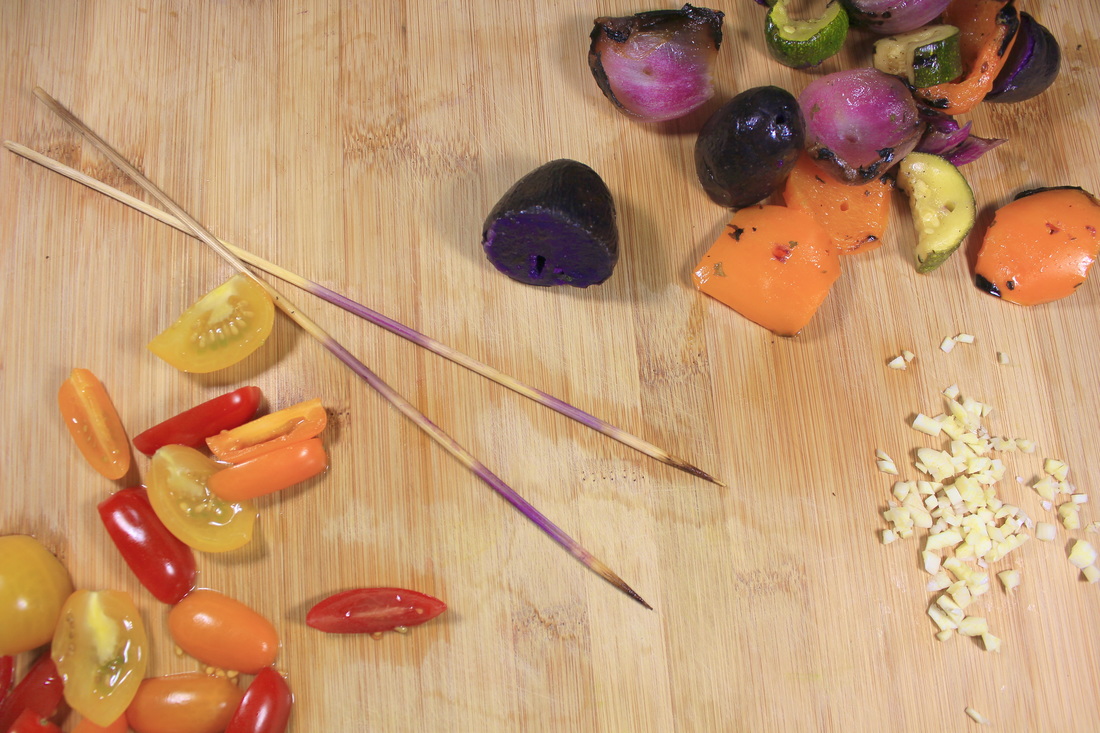
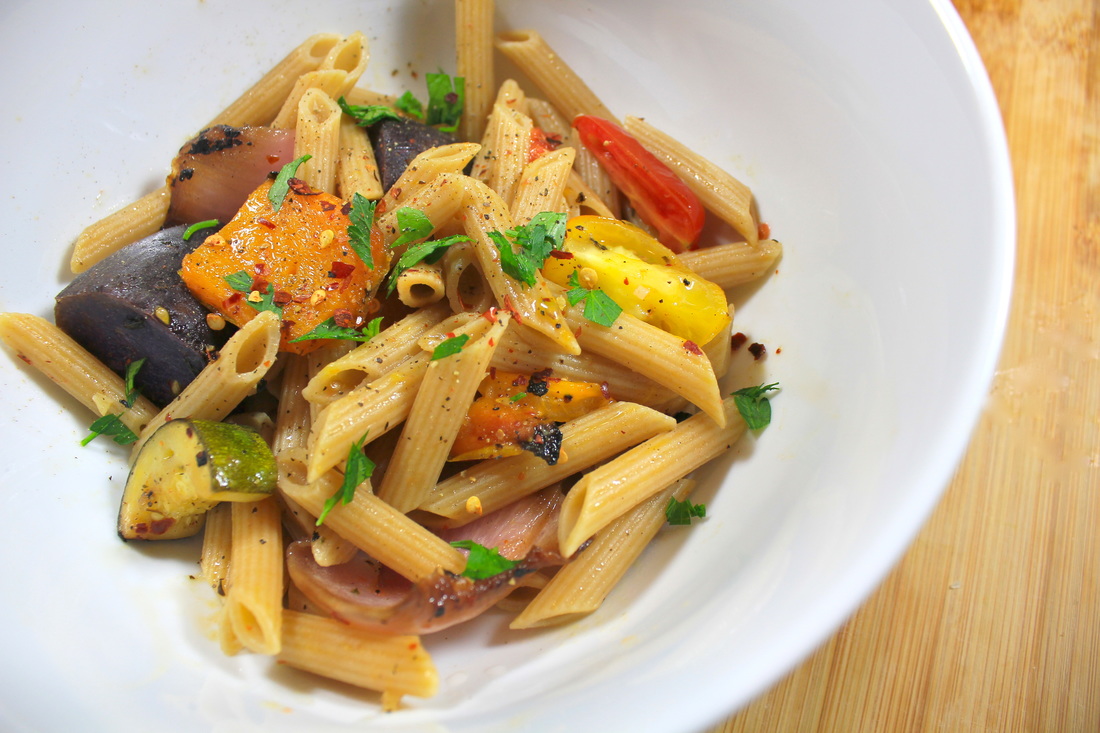
You're just going to add portions to your liking, so I don't have a recipe with exact measurements for you, but here what you'll need. Ingredients: • 2 endives (will yield about 18-ish useable leaves) • 1-2 tbsp honey • A couple tbsp of chopped walnuts • About 3 leaves of fresh basil, finely chopped • About a tsp of garlic powder • About 1/4 tsp of dried oregano • About 3 fresh chives, chopped • Tbsp of fresh lemon juice, plus half tbsp of lemon zest • Sea salt, to taste • Cracked black pepper, to taste • 3-4 oz goat cheese Optional toppings: balsamic glaze (highly recommended!), pomegranate Directions: In a small bowl, mix half of your goat cheese with the basil, oregano, garlic powder, salt, and pepper Spread on half of your endive leaves, drizzle with lemon juice, and top with lemon zest. Add more salt and pepper, to taste. Take the remaining goat cheese and spread on the second half of your endive leaves. Top with salt, walnuts, and a drizzle of honey That's it! Keep cold until ready to serve. Hello from Atlanta!! As most of you know, Sterling and I moved from Chicago to ATL last week. He received a promotion (woop woop!) about 6 weeks ago, and it brought us here. I'll be doing a little blog post about the move in the next coming days... right now let's focus on the food. Memorial Day was this past Monday. Sterling grilled up some chicken, burgers, and hot dogs on the balcony, and I made mac & cheese, creamed corn, baked beans, and veggie kabobs. We had a few new friends over, drank a few drinks, ate a few plates of food, and lounged by the pool. Summer is approaching (allegedly it's not actually summer yet, although this Atlanta HEAT is telling me otherwise), which means cookout season is upon us. One of my new goals is to be more conservative with the amount of food I waste, striving to make meals solely with what I've got in the fridge and pantry. Back in Chicago, we were around the block from a grocery store, so I literally stopped in every day after work to pick up ingredients for dinner. It was expensive and wasteful. So, in the light of conserving food and embracing cook out season, I came up with this quick and easy pasta idea that uses leftover veggie kabobs. This may come as a surprise to you, but veggie kabobs are usually the last to go at a cookout, so there are usually plenty of skewered leftovers. Add 'em to some whole grain pasta with sautéed garlic and tomatoes, and you're good to go. It aint fancy, but it's delicious, quick, and practical. Serves: 2
Cook time: 15 minutes Ingredients: • 8 oz whole grain pasta • 2 veggie kabobs, removed from skewers (should yield about 1 heaping cup of veggies) • 1 garlic clove, minced • 1/3 cup cherry tomatoes, quartered • Salt and cracked black pepper to taste • Quarter tsp garlic powder • Half tsp crushed red pepper flakes • 1-2 tbsp olive oil Optional toppings: chopped italian flat leaf parsley, basil, sun dried tomatoes Directions: • Cook pasta according to package instructions, drain and set aside • Heat 1 tbsp olive oil in skillet and add leftover veggies until heated through • Add garlic and crushed red pepper flakes. Cook until fragrant, about 1 minute • Add tomatoes, stir, and cook for another 1-2 minutes, until tomatoes have softened without becoming mushy • Stir in pasta, season with salt/pepper and garlic powder, and drizzle with remaining olive oil, as desired • Finish with optional toppings of choice and serve hot! When I was in high school, I went to the same restaurant for lunch every thursday. I always sat in the same booth, and I always ordered the Penne Puttanesca. I love the tangy tomato sauce with the salty capers and the briny olives. I would smother my pasta in parmesan cheese and finish the leftover sauce by spreading it onto half a loaf of french bread. Now, while I will not sit here and pretend that I don't do the exact same thing when I go out to eat now, I will say that I have lost my teenage metabolism and do strive to lighten it up now and then. This puttanesca that I present to you tastes almost exactly like that dish I remember so fondly- only it is carb and anchovy free. Which means that now I can eat that half loaf of french bread without thinking twice.
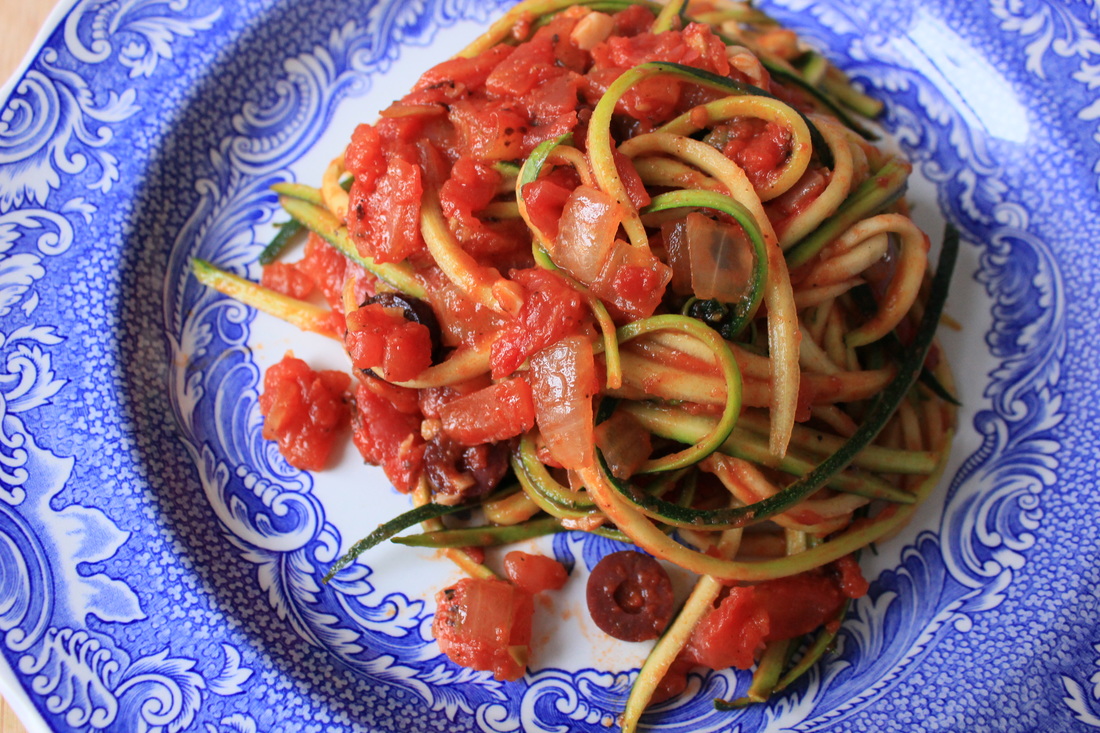
I know I previously said that I don't consider zucchini noodles to be an adequate substitute for pasta, but I was wrong. I was so wrong. Today I've learned that it's all about the sauce, man. I've made a pretty vast range of sauces to cover my zucchini noodles in the past- alfredo, creamy red pepper, lentil marinara, pesto- and while it all tasted good, it just never felt as satisfying to me as a big ass bowl of pasta. I do not know what the difference is here today, but I have half of this puttanesca left over and I am so satisfied that I am actually leaving it for my lunch tomorrow. It's salty, briny, tangy, spicy, texturally pleasing, smells amazing. I dunno. It just works. It is really damn good, and I am so excited to share it with you. Serves: technically makes 4 servings, but it's zucchini which means it's less filling than real pasta so let's call it 2 servings, shall we? Cook time: 10 minutes (no joke) Ingredients: • 3 zucchini, julienned. (as mentioned in my last zucchini noodle post, you'll only want to use the firmer parts. stop peeling once you've reached the seedy, softer center) • 14.5 oz diced tomatoes (I use the "fire roasted" flavor) • 1 tbsp tomato paste • 2 garlic cloves, minced • Half a large sweet or white onion, diced • 1 1/2 heaping tsp capers • 2 heaping tbsp kalamata olives, sliced thinly • 1 tbsp olive oil • Salt and pepper to taste Optional toppings: red pepper flakes, fresh basil, shaved parmesan Directions: • In a nonstick skillet, heat olive oil over medium-high heat. Once hot, add onions. Season with a pinch each of salt and pepper. Cook until onions are translucent, stirring occasionally. • Add garlic and tomato paste and stir to combine. Cook until garlic is fragrant, about 1 minute. • Add diced tomatoes, and heat for a minute, stirring occasionally. Then add olives and capers, and stir to combine. Let simmer for 1 minute. Taste and season with salt and pepper, as needed. • Next, add the zucchini in bunches. It'll seem like too much zucchini at first, but as it cooks, the zucchini will release its' moisture and get smaller. Keep adding and stirring continuously until all of the zucchini has been incorporated. Cook for another 30 seconds to a minute, or until all of the zucchini is coated in the sauce and heated through. It should still have a bite to it. • Remove from heat, top with desired optional toppings of choice, serve hot, and enjoy :) |
Hi! I'm Shantal.
Categories
All
|



 RSS Feed